Before you configure the Sensor ports, you must have installed the Sensor and added to the Manager interface.
Configure inline mode for a single Sensor
This section contains recommendations for deploying a single Sensor in inline mode.
Note
Configuration for a fail-open kit is described in the fail-open kit documentation. For example, to configure the Sensor to work with the copper fail-open kit, see the Trellix Intrusion Prevention System Fail-Open Kit Product Guide.
Task
- In the Manager interface, select Devices → <Admin Domain Name> → Devices → <Device_Name> → Setup → Physical Ports.
-
Double-click on a numbered port (for example, 3/1) from
Monitoring Ports.
Monitoring Port Details panel displays current port settings.
Verifying ports for inline fail-open mode 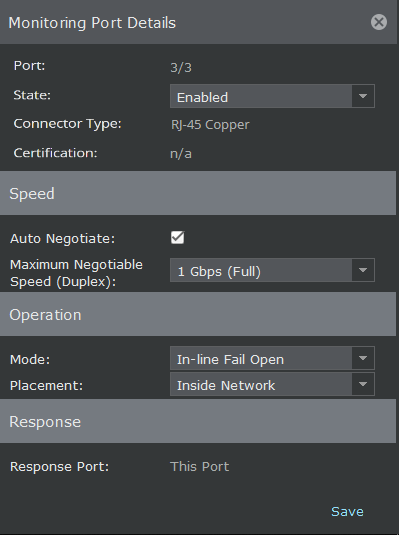
- Set the Administrative State to Disable (off).
- Select the other port (for example, 3/2) and set the Administrative State to Disable (off).
- Now select the aforesaid port (port 3/1) and select the Auto Negotiate checkbox.
- Select the port Speed.
-
Do one of the following:
- For inline fail-closed operation, select Inline Fail Closed as the operating Mode.
- For inline fail-open operation, select
Inline Fail Open or
Inline Fail Open - Active as the operating Mode. Confirm (Yes) that you have already connected a fail-open kit. However, if your Sensor supports in-built fail-open on that port, you might not require a fail-open kit.
Note
Inline Fail Open indicates in-built passive fail-open which is supported on different Sensors differently.
- Select the area of your network to which the current port is connected: Inside (traffic generated internally, destined for the external network) or Outside (traffic generated externally, destined for the internal network).
- Set the Administrative State to Enable (on).
- Click Save.
- Repeat for any other ports you need to configure.
- Download the changes to your Sensor by clicking the Deploy Pending Changes option.