The following steps describe how to add a Suricata standalone Sensor to the Manager:
Steps:
Log on to the Manager using the default user name
(admin)and password(admin123).Go to Devices → <Admin Domain Name> → Global → Device Manager.
The Device Manager page is displayed.
Select the Sensors tab and then click
 .
.Note
You do not require a license file to enable IPS on NS-series Sensors.
The Add Devices - Step 1 of 2 panel is displayed.
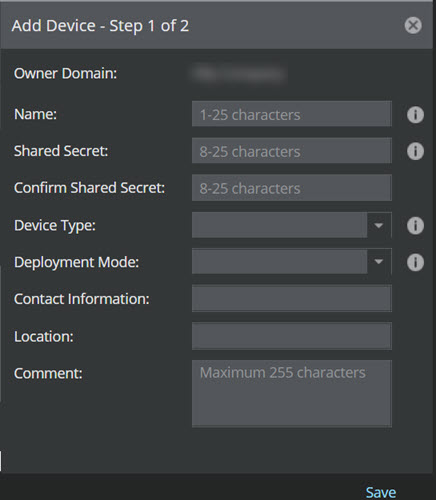
Enter the following mandatory information in the appropriate fields:
Name — The Sensor name must begin with a letter. The maximum length of the name is 25 characters.
Shared Secret — The shared secret must be a minimum of 8 characters and maximum of 25 characters in length. The key cannot start with an exclamation mark nor can have any spaces. The parameters that you can use to define the key are listed below:
26 alphabets: Uppercase and lowercase (A, B, C,...Z and a,b,c,...z)
10 digits: 0 1 2 3 4 5 6 7 8 9
31 symbols: ~ ` ! @ # $ % ^ & * ( ) _ + ‑ = [ ] { } \ | ; : " ' , . < /
Retype the password in Confirm Shared Secret.
Note
The Sensor name and shared secret key that you enter in the Manager must be identical to the shared secret that you will enter later during physical installation or initialization of the Sensor (using CLI interface) as stated in the Configure Sensor information section. If not, the Sensor will not be able to register itself with the Manager.
Device Type — Specifies the type of device to be added. Select Suricata Sensor.
Deployment Mode — Select Direct or Indirect.
Note
Selecting Direct enables online Sensor update. Direct is the default mode.
Contact Information — (Optional) Type the contact information.
Location — (Optional) Type the location.
Comment — (Optional) Type the comment.
Click Save.
The added Sensor is displayed on the Sensors tab of Device Manager page.
To add and assign a license to the standalone Sensors, you can use both the Licenses and Device Manager page in the Manager. See Management of NS9600 Sensor licenses for more details.