To add the second condition to the example signature:
Task
-
In the
Signature Details section, click
 to add the condition.
The first condition is minimized and the second condition reads as [AND THEN] Condition 2, thus signifying the first condition must match before the second condition can be tested.
to add the condition.
The first condition is minimized and the second condition reads as [AND THEN] Condition 2, thus signifying the first condition must match before the second condition can be tested.Adding conditions 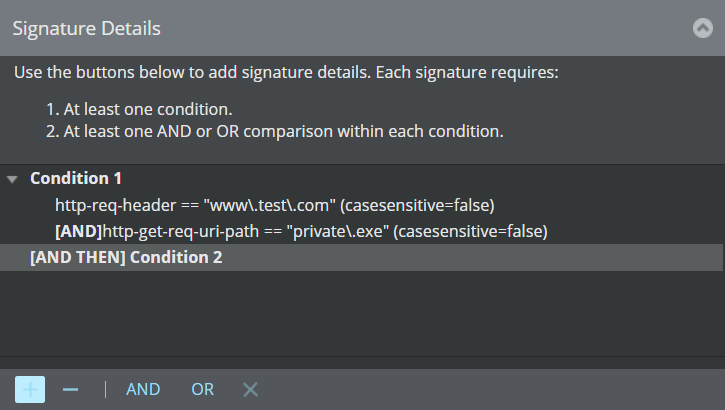
-
Select the text of the second condition, click
 .
.
- Select Numeric Value Match from the Comparison Type drop-down list.
- Select http from the Protocol list.
- Select req-uri-length for the Protocol Field, then get as the request method.
-
Select
Greater than from the Operator drop-down list.
Configure Comparison window to select the comparator 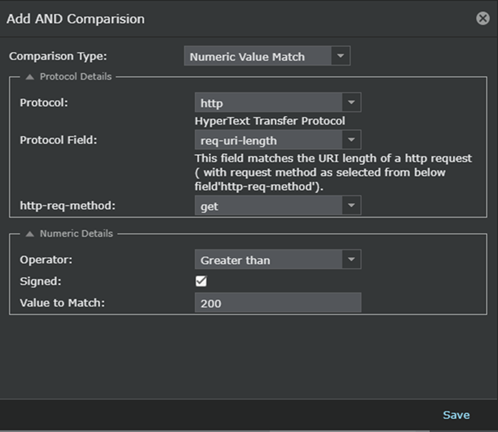
- (Optional) Check the Signed check box if you want the value to be signed.
- Type a length value in the Value to Match field. For this example, type 200 (bytes) as the length over which this comparison will match.
- Click Save; you are returned to the New Signature window.
-
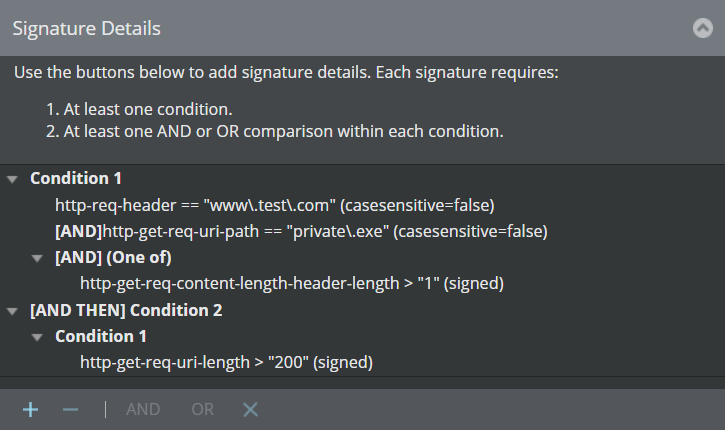
Verify that your newly added comparison appears under
Condition 2 under the heading [AND Then].
View the new condition defined 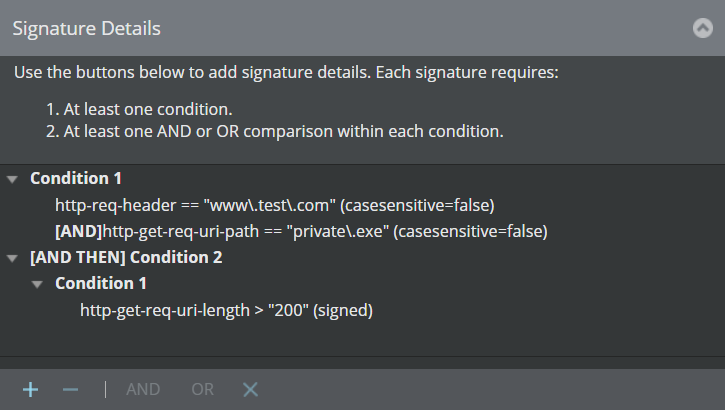
-
Click on
Condition 1, then click
under
Comparisons.
- Select Numeric Value Match from the Comparison List.
- Select http from the Protocol.
- Select req-header-length for the Protocol Field, select content-length as the http-req-hdr-type, then select get as the http-req-method.
- Select Greater than from the Operator drop-down list.
-
Type a length value in the
Value field. For this example, type
1 (byte) as the length over which this comparison will match.
Note
As stated in the Description field, a value of 1 byte is significant for this comparison as the normal header length of a request should be zero.
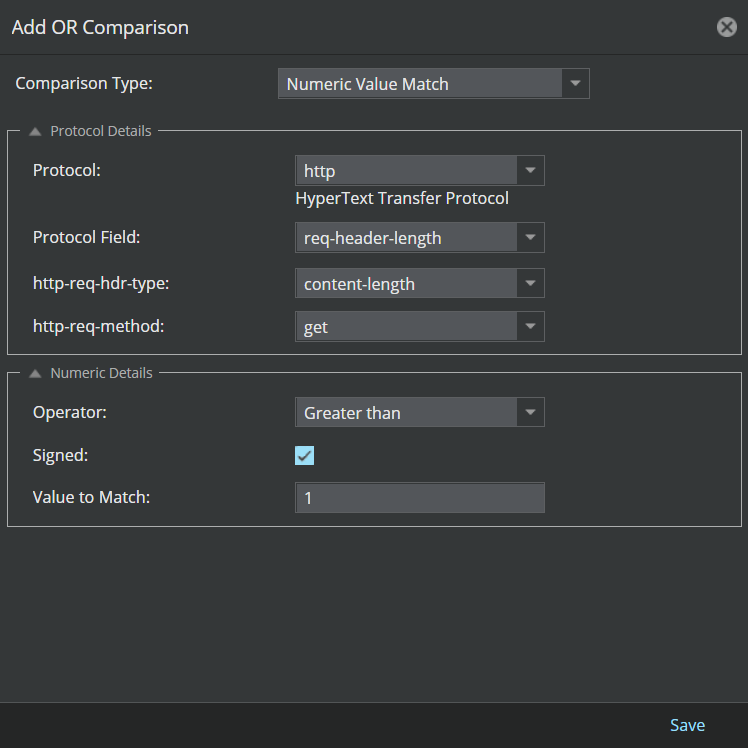
- Click Save; you are returned to the New Signature window.
-
Verify that your newly added comparison appears beneath the first comparison you configured for
Condition 2. The second comparison line is preceded by
[OR] to signify the either-or relationship between the two comparisons.
-
Click
Update in the signature details window.
Note
Though there are multiple conditions and comparisons, only one signature was created; so only one signature is uploaded to the Manager.
- Verify that the attack definition is listed on the Native Trellix IPS Format tab.
- Click Save to save the Trellix IPS Custom Attack in the Manager server database.
- Make sure the Trellix IPS Custom Attack is saved in the database and also published in the policies.