Use the Custom Categories area in the SSL Intercept Settings page to add a domain that you do not want whitelisted to the custom whitelist exception category or to delete a domain from the custom whitelist exception category using the Web UI. You can add an unlimited number of domains to the custom whitelist exception category. You can add or delete each custom domain as an exception separately. Custom categories are optional.
You can use tags to associate and filter related domains on the custom whitelist as exceptions. You must manually delete the domains that are associated with a tag on the appliance.
In the following example, the Network Security appliance does not yet contain domains for the custom whitelist as exceptions.
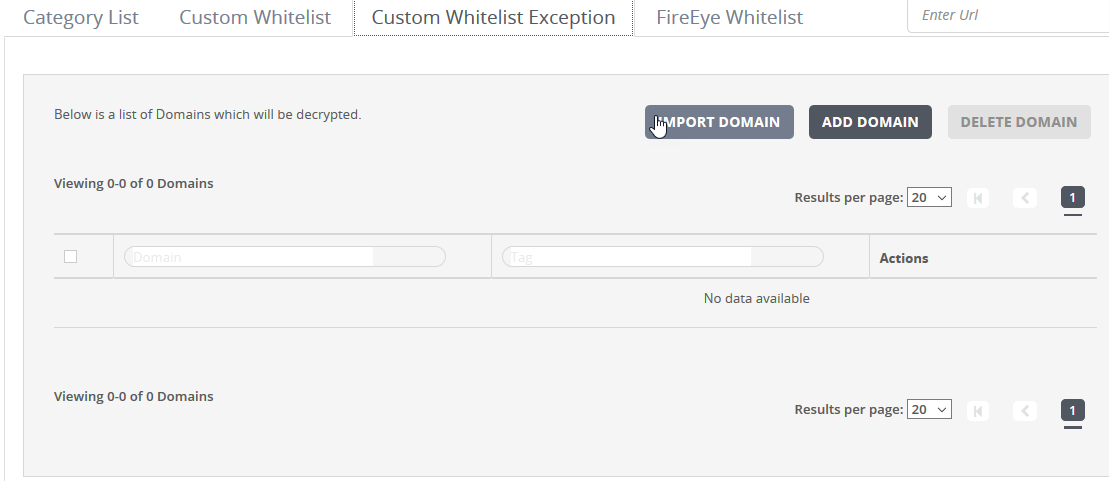
The following table describes the custom whitelist exception fields.
Field | Description |
|---|---|
Domain | Domains that were added to the whitelist as exceptions. |
Tag | Tags that are used to associate related domains. |
Actions | Action that you can take on the domain exception whitelist. |
In the Web UI, choose Settings > SSL Intercept.
Click Whitelist Categories (optional).
Click Custom Whitelist Exception.
Click Add Domain. The Add Custom Whitelist Exception Domain(s) window opens.
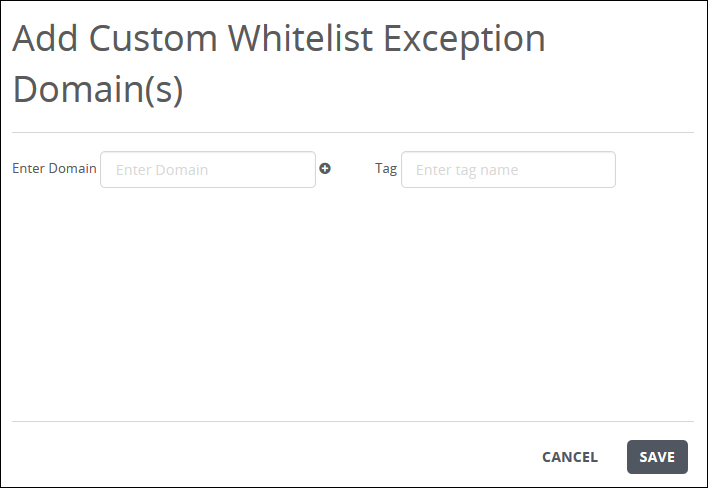
Enter the domain that you want to add to a custom whitelist exception category.
Enter the tag that you want to associate with the domain.
Click the plus sign to add the domain entry. You can add multiple entries at one time.
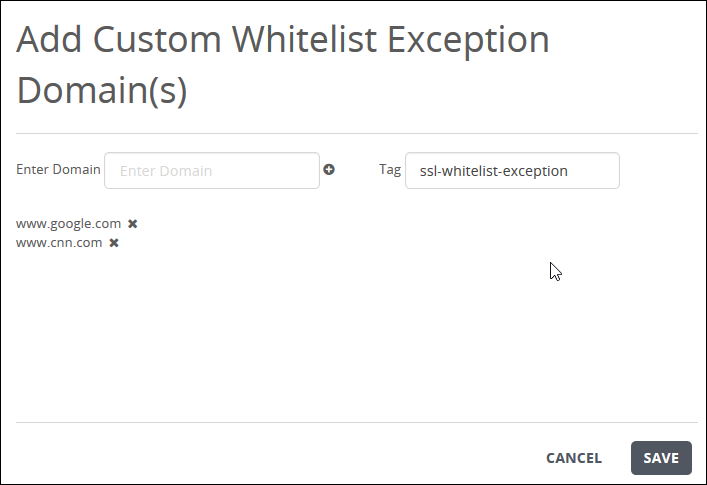
Click Save.
The domain is added to the custom whitelist exception category.
In the Web UI, choose Settings > SSL Intercept.
Click Custom Categories (optional).
In the domain list, locate the entry you want to delete.
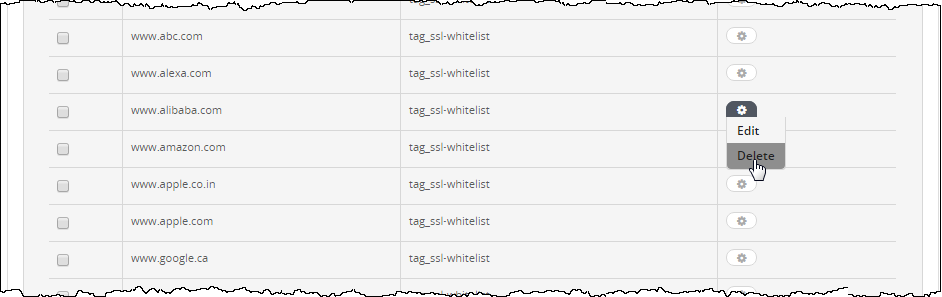
Click the action (
.png) ) icon in the Actions column.
) icon in the Actions column.Click Delete.
Click Yes to confirm that you want to delete the domain entries.
Click Save.
The domain is removed from the custom whitelist exception category.