---
title: "Auto-scale External Controller for High-Availability"
slug: "auto-scale-external-controller-for-high-availability"
tags: ["Product Usage", "vIPS 10.1.10"]
updated: 2026-09-11T20:35:31Z
published: 2026-09-11T20:35:31Z
canonical: "docs.trellix.com/auto-scale-external-controller-for-high-availability"
---
> ## Documentation Index
> Fetch the complete documentation index at: https://docs.trellix.com/llms.txt
> Use this file to discover all available pages before exploring further.
# Auto-scale External Controller for High-Availability
To launch the External Controller high-availability from Azure, perform the following steps:
## Task
1. Click
**All services** and then click
**Virtual machine scale set** under the
**COMPUTE** section.
The
**Virtual machine scale set** blade opens.
2. Click
**+ Add**.
The
**Create a virtual machine scale set** window opens with the
**Basics** tab.
3. On the
**Basics** tab, enter the following details:
| Option | Definition |
| --- | --- |
| **Project details** | **Subscription** - The subscription linked with your Azure account is selected by default. If you have multiple subscription accounts, select the subscription account in which you would like to launch the vIPS Controller virtual machine scale set. **Resource group** - **Create new** - You can create a new resource group to be protected. - **Select existing** - Select the resource group to be protected. |
| **Scale set details** | **Virtual machine scale ser name** - Type a name for the vIPS Controller virtual machine scale set. **Region** - Select the region where the vIPS Controller virtual machine must be created. **Availability zone** - [Optional] Select the availability zone for providing high availability to the vIPS Controllers. It is recommended to deploy one Controller in one Availability zone and the other Controller in another Availability zone. This way when there is a downtime, one of the Controllers is available. |
| **Instance details** | **Image** - Select the vIPS Controller image to be deployed as a virtual machine scale set. **Size** - Select the size of the virtual machine. |
| **Administrator account** | **Authentication type** - Select **Password** authentication type. > [!NOTE] > Note > > Only password authentication type is supported for Controller. **Username** - Enter the user name that must be used for the Controller virtual machine. **Password** - Enter a password for logging into the Controller. > [!NOTE] > Note > > Note the password as it is required for final deployment of the Controller which requires you to login to the Controller. **Confirm Password** - Retype the Password. |
> [!NOTE]
> Note
>
> Azure validates the information you enter and a green tick appears against the fields where you enter details.
4. Click
**Next: Disks >**.
The
**Disks** tab opens. Enter the following details:
| Option | Definition |
| --- | --- |
| **Disk options** | **OS disk type** - The Premium SSD type is selected by default. Trellix recommends you use Premium SSD disk type for vIPS Controller for improved performance. |
| **Data disks** | You can attach a new disk or an existing disk for your virtual machine. |
| **Advanced** | **Use managed disks** - Select **Yes** for Azure to manage the disk availability automatically. |
5. Click
**Next: Networking >**.
The
**Networking** tab opens. Enter the following details:
| Option | Definition |
| --- | --- |
| **Virtual network** | Select the virtual network in which the Controller must be deployed. |
| **Network interafce** | **Create new nic** - You can create a new network interface for the vIPS Controller virtual machine. Or, Select existing new network interface for the vIPS Controller virtual machine. |
6. Click
**Next: Scaling >**.
The
**Scaling** tab opens. Enter the following details:
| Option | Definition |
| --- | --- |
| **Instance** | **Intial Instance Count** — Enter the number of active instance available in the virtual machine scale set at a time. For External Controller high availability, Trellix recommends you to set this value to 1. |
| **Scaling** | **Scaling policy** — Trellix recommends you to select this option to scale the External Controller scale set based on any capacity or schedule. **Minimum number of VMs**— Trellix recommends you to set this value to 1 for External Controller high availability. **Maximum number of VMs** — Trellix recommends you to set this value to 1 for External Controller high availability. |
| **Scale out** | **CPU threshold (%)** — Enter the CPU percentage threshold to start the **Scale out** for autoscale set. **Duration in minutes** — Enter the duration for which the samples are collected for the metric when auto scaling. **Number of VMs to increase by** — Enter the number of External Controllers to be deployed newly when the autoscale reaches **Scale out** condition. |
| **Scale in** | **CPU threshold (%)** — Enter the CPU percentage threshold to start the **Scale in** for autoscale set. **Number of VMs to decrease by** — Enter the number of External Controllers to be deleted when the autoscale reaches **Scale in** condition. |
7. Click
**Next: Management >**.
The
**Management** tab opens. Enter the following details:
| Option | Definition |
| --- | --- |
| **Upgrade policy** | **Upgrade mode** — Select the **Manual - Existing instance must be manually upgraded** upgrade mode. |
8. Click
**Next: Health >**.
The
**Health** tab opens. Enter the following details:
| Option | Definition |
| --- | --- |
| **Health** | **Monitor application health** — Select **Disable** option for monitoring the health status. |
9. Click
**Next: Advanced >**.
The
**Advanced** tab opens. Enter the following details:
| Option | Definition |
| --- | --- |
| **Custom Data** | Enter the **Custom Data** for the vIPS controller in the following format: ``` { "Primary Manager IP" : "IPS_PRIMARY_MANAGER_PRIVATE_IP", "Secondary Manager IP" : "IPS_SECONDARY_MANAGER_PRIVATE_IP", "Controller Name" : "CONTROLLER_NAME", "Controller Shared Key" : "SHARED_KEY" } ``` |
| Parameters | Description |
| --- | --- |
| Primary Manager IP | Private IP address of the primary Manager |
| Secondary Manager IP | Private IP address of the secondary Manager |
| Controller Name | Name of the Controller defined in the Manager |
| Controller Shared Key | Shared secret key of the Controller provided in the Manager |
10. Click
**Next: Tags >**.
The
**Tags** tab opens. On this tab, you can categorize resources by applying a tag name and value to multiple resources and resource groups.
11. Click
**Next: Review + create >**.
The
**Review + create** tab opens. Validate the summary details which contain all the parameters selected. Make sure the validation is passed.
12. Click
**Create**.
The vIPS Controller virtual machine scale set is created.
> [!NOTE]
> Tip
>
> To view the vIPS Controller virtual machine, go to **All services**, under the **Compute** section, and click **Virtual machines**. You are directed to the **Virtual machines** page where you can view or delete the vIPS Controller virtual machine.
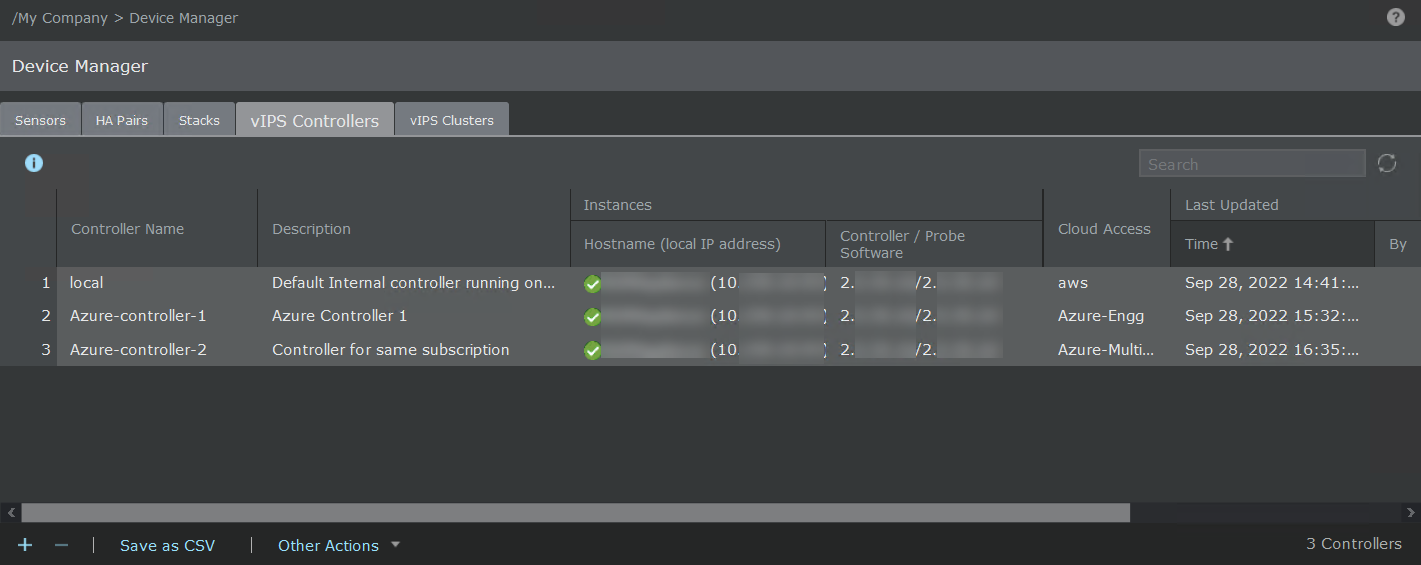
13. After the vIPS Controller is deployed, go to
**Devices** → **** → **Global** → **Device Manager** in the Manager and select
**vIPS Controllers** tab to validate successful deployment of the vIPS Controller.
If the vIPS Controller is deployed successfully, a green icon appears next to the Controller name.