---
title: "Azure CLI command deployment for External Controller"
slug: "azure-cli-command-deployment-for-external-controller"
tags: ["Product Usage", "vIPS 10.1.10"]
updated: 2026-09-11T20:35:31Z
published: 2026-09-11T20:35:31Z
canonical: "docs.trellix.com/azure-cli-command-deployment-for-external-controller"
---
> ## Documentation Index
> Fetch the complete documentation index at: https://docs.trellix.com/llms.txt
> Use this file to discover all available pages before exploring further.
# Azure CLI command deployment for External Controller
To launch the External Controller as a virtual machine from Azure marketplace, perform the following steps:
## Task
1. Log in to the machine which has the Azure CLI installed on it.
If you are logging in to the Azure CLI for the first time, execute the following command:
```
az login
```
2. Save the following user data for establishing communication as a .txt file in the machine where Azure CLI is installed:
```
{
"Primary Manager IP" : "IPS_PRIMARY_MANAGER_PRIVATE_IP",
"Secondary Manager IP" : "IPS_SECONDARY_MANAGER_PRIVATE_IP",
"Controller Name" : "CONTROLLER_NAME",
"Controller Shared Key" : "SHARED_KEY"
}
```
If you have deployed the Manager as MDR, use the following user data:
```
{
"Primary Manager IP" : "IPS_PRIMARY_MANAGER_PRIVATE_IP",
"Secondary Manager IP" : "IPS_SECONDARY_MANAGER_PRIVATE_IP",
"Controller Name" : "CONTROLLER_NAME",
"Controller Shared Key" : "SHARED_KEY"
}
```
3. Execute the following command:
```
az vm image list --all -p trellix_azure --offer trellix_vips_external_controller
```
| Parameter | Description |
| --- | --- |
| -p | Enter *trellix_azure* |
| --offer | Enter *trellix_vips_external_controller* |
Note the urn generated for the Controller image.
4. Execute the following command to accept the terms when deploying the Controller offer for the first time from marketplace:
```
az vm image accept-terms --urn
```
| Parameter | Description |
| --- | --- |
| --urn | Enter the urn value generated from the previous step. |
5. Execute the following command to deploy the Controller virtual machine:
```
az vm create --resource-group --name --image --admin-username --ssh-key-value --custom-data --size "Standard_F4s_v2 " --subnet --vnet-name
```
Following are the input parameters required for the CLI command:
| Parameter | Description |
| --- | --- |
| --resource-group | Name of the resource group where the Controller has to be created |
| --name | Combination of name and number to retrieve the Controller name |
| --image | URN value of the Controller image from Marketplace |
| --admin-username | Login user name for the Controller instances in the scale set |
| --ssh-key-value | SSH key value for the Controller |
| --custom-data | Location in the machine where the user data .txt file is available |
| --size | The Controller is deployed as a Standard F4s_v2 virtual machine. Enter "Standard_F4s_v2". |
| --subnet | Names of the subnet where the Controller has to be created |
| --vnet-name | Name of the vnet where the Controller has to be created |
For a list of advanced CLI commands to create a virtual machine, see [Azure CLI commands for creating a virtual machine](https://docs.microsoft.com/en-us/cli/azure/vmss?view=azure-cli-latest)in Microsoft Azure documentation.
The vIPS Controller virtual machine is created.
> [!NOTE]
> Tip
>
> To view the External Controller virtual machine, go to **All services**, under the **Compute** section, and click **Virtual machines**. You are directed to the **Virtual machines** page where you can view or delete the External Controller virtual machine.
6. [Optional] If you are using
**IAM role** for
**Cloud Access**, you must assign the user assigned managed identity to the External Controller virtual machine.
To assign user assigned managed identity to the External Controller virtual machine, do the following:
1. Go to the External Controller instance you want to assign the IAM role to, under
**Identity** category, and select
**User assigned**.
2. The
**Add user assigned managed identity** window opens.
3. Select the required User assigned managed identities and click
**Add**.
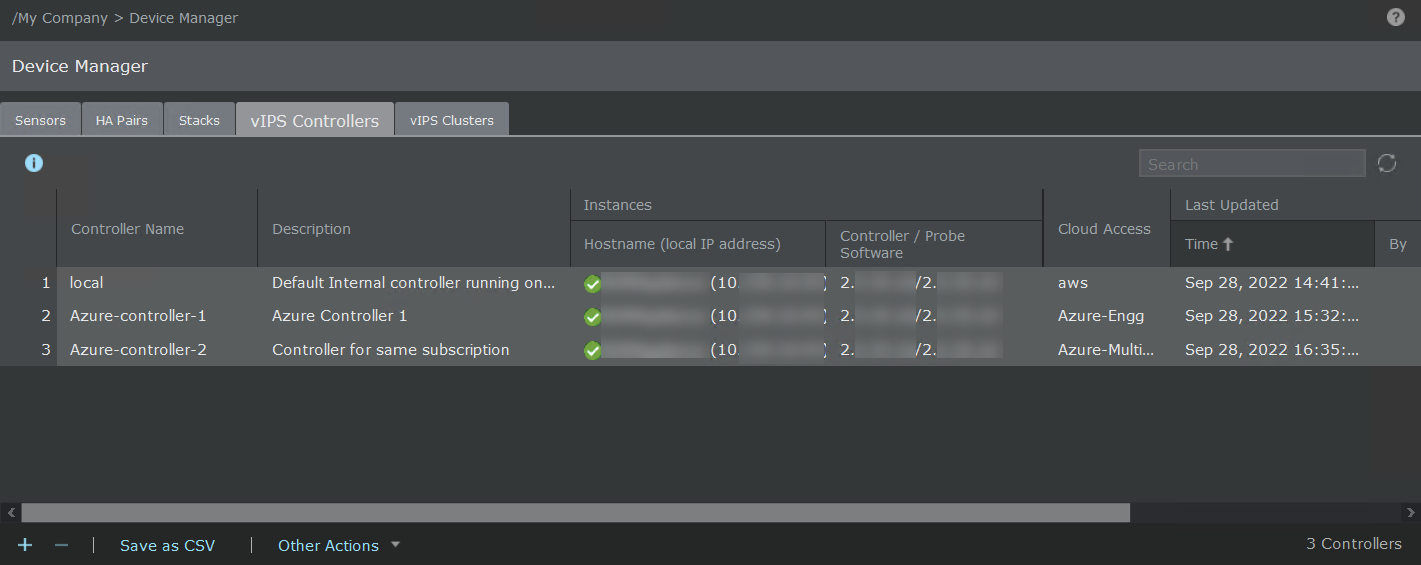
7. After the External Controller is deployed, go to
**vIPS Controllers** tab in the Manager from
**Devices** → **** → **Global** → **Device Manager** to validate successful deployment of the External Controller.
If the External Controller is deployed successfully, a green icon appears next to the Controller name.