You can configure the HP Network Automation server details in the Manager. To do so, perform the following steps.
Task
-
Select
Manager → <Admin Domain Name> → Integration → HP Network Automation.
Enable page 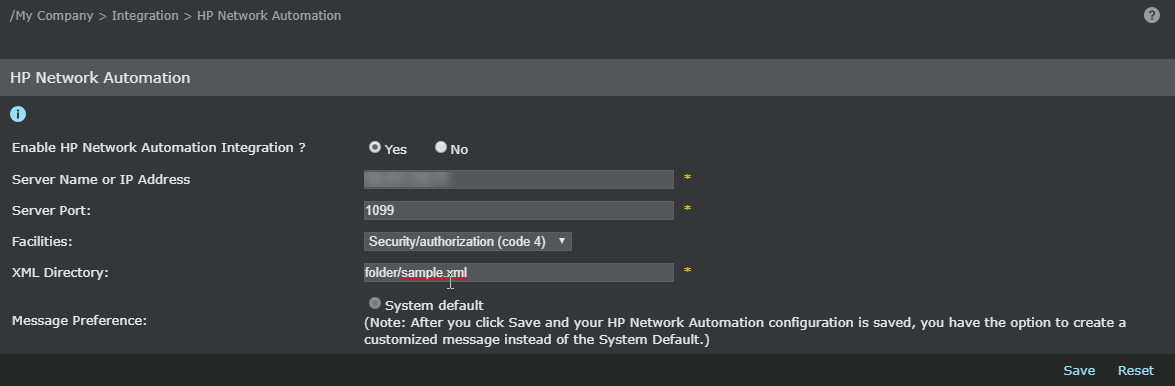
-
Fill in the following fields.
Field Description Enable HP Network Automation Integration? Enables or disables HP Network Automation Integration. Yes to enable; No to disable. Server Name or IP Address Server name or IP address of the HP Network Automation server. Server Port HP Network Automation server port number. Facilities Allows you to select the following from the drop down list: - Security/ authorization (code 4)
- Security/ authorization (code 10)
- Log audit (note 1)
- Log alert (note 1)
- Clock daemon (note 2)
- Local user 0 (local0)
- Local user 1 (local1)
- Local user 2 (local2)
- Local user 3 (local3)
- Local user 4 (local4)
- Local user 5 (local5)
- Local user 6 (local6)
- Local user 7 (local7)
XML Directory Path on the Manager server where the Sensor configuration XML file is located. Message Preference Set the preferred type of message in syslog forwarder. -
Click
Save.
Customizing Message PreferenceClick Save.System default is selected, by default.
- Select Customized to customize the message preference.
- Click Edit to edit a customized message preference.
- Click Save to save settings.