Configure the Sensor with the network information, a name, and the shared secret key that the Sensor uses to establish secure communication with the Manager. Use the name and key values you set in Add the Sensor to the Manager section.
Tip
You must have physical access to the Sensor when you configure a Sensor for the first time.
At any time during configuration, you can type a question mark (?) to get help on the Sensor CLI commands. Type commands for a list of all commands.
Log in to the Sensor using the terminal connected to the Console port.
At the prompt, log in using the default Sensor username
adminand passwordadmin123.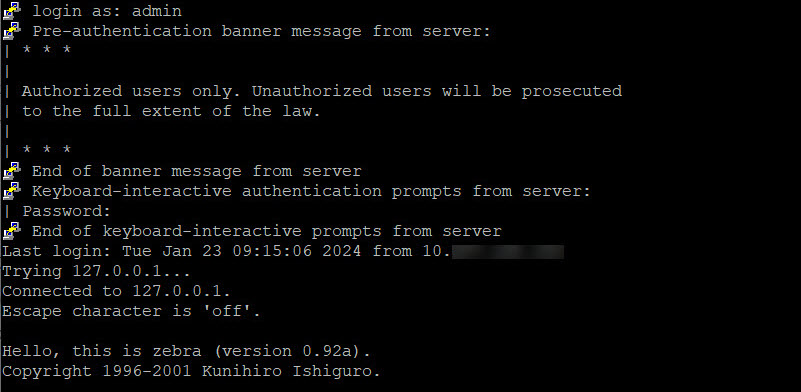
(Optional, but recommended) Change the Sensor password. At the prompt, type
passwd. The Sensor prompts you to enter the new password and asks you for the old password.Note
A password must contain between 8 to 25 characters, is case-sensitive, and can consist of any alphanumeric character or symbol.
Set the name of the Sensor.
Tip
You can enter the
setupcommand at the prompt which will automatically prompt you to provide the information shown in the subsequent steps of this section. Or, you can use thesetcommand instead. If you use thesetcommand, you must manually enter the complete command syntax as shown in the subsequent steps of this section.Type
set sensor name <word>at the prompt.Example:
set sensor name HR_sensor1Note
The Sensor name is a case-sensitive character string up to 25 characters. The string can include hyphens, underscores, and periods, and must begin with a letter.
If the Sensor is not on the same network as the Manager, you must set the address of the default gateway.
For IPv4: Type
set sensor gateway <A.B.C.D>at the prompt.Example:
set sensor gateway 192.168.1.1For IPv6: Type
set sensor gateway <X:X:X:X:X:X:X:X>at the prompt.Example:
set sensor gateway 26xx:d4x:4xx:3xx::1
Set the IP address of the Manager server.
For IPv4: Type
set manager ip <A.B.C.D>at the prompt.Example:
set manager ip 10.2.2.xFor IPv6: Type
set manager ip <X:X:X:X:X:X:X:X>at the prompt.Example:
set manager ip 43xx:d4x:2xx:5xx::2
Set the IP address and subnet mask of the Sensor.
For IPv4: Type
set sensor ip <A.B.C.D> <E.F.G.H>at the prompt.Specify an IP address using four octets separated by periods: X.X.X.X, where X is a number between 0 and 255, followed by a subnet mask in the same format.
Example:
set sensor ip 192.168.1.1 255.255.255.0For IPv6: Type
set sensor ip <X:X:X:X:X:X:X:X:X/Y>at the prompt.Specify an IPv6 address using eight hexadecimal groups separated by colons, followed by the prefix length (a number between 0 and 128).
Example:
set sensor ip 26xx:xd40:4xx:2xxx::5xxx/64
If prompted, reboot the Sensor. Type
rebootNote
The Sensor can take up to five minutes to complete its reboot.
Ping the Manager from the Sensor to determine if your configuration settings to this point have successfully established the Sensor on the network. At the prompt, type the following command:
ping <manager IP address>If the ping is successful, continue with the following steps. If not, type
showto verify your configuration settings and check if the information is correct.Set the shared secret key value for the Sensor. At the prompt, type the following command:
set sensor sharedsecretkeyThe Sensor then prompts you to enter and, subsequently, confirm the shared secret key value.
Note
This value is used to establish a trust relationship between the Sensor and the Manager. The secret key value can be between 8 and 25 characters of any ASCII text. The shared key value is case-sensitive. Make sure the value matches the shared secret key value you provided in the Manager interface while adding the Sensor.
Type
showto verify the configuration information. Check that all information is correct.Type
exitto exit the session.