Prerequisites:
The Sensor must be set up with trust established with a Manager server.
The Sensor has a free port pair which can be deployed in in-line fail-open mode.
It is assumed that you have inserted the necessary transceiver modules into the Sensor if you have completed cabling the Sensor and fail-open switch.
When you set up a Sensor for the first time, its ports are disabled by default. The Sensor ports must be manually configured for in-line fail-open operation.
Steps:
In the Trellix IPS Manager, go to Devices → <Admin_Domain_Name> → Devices → <Device_Name> → Setup → Physical Ports.
Double-click port one of the configurable ports, say G2/1.
A configuration panel appears on the right side of the window.
Click the State drop-down and select Enabled.
You are asked whether you want to proceed since this configuration will also impact port G2/2.
Click Yes to proceed.
This enables port G2/1-G2/2.
Select the Auto Negotiate checkbox and make sure the Speed (Duplex) is set to 1 Gbps (Full).
Click the Mode drop-down and select In-line Fail-Open – Active.
Click the Placement drop-down and select Inside Network or Outside Network, depending on how you want to configure your ports.
Trellix recommends choosing Gx/1 or xA as the Inside Network and Gx/2 or xB as the Outside Network.
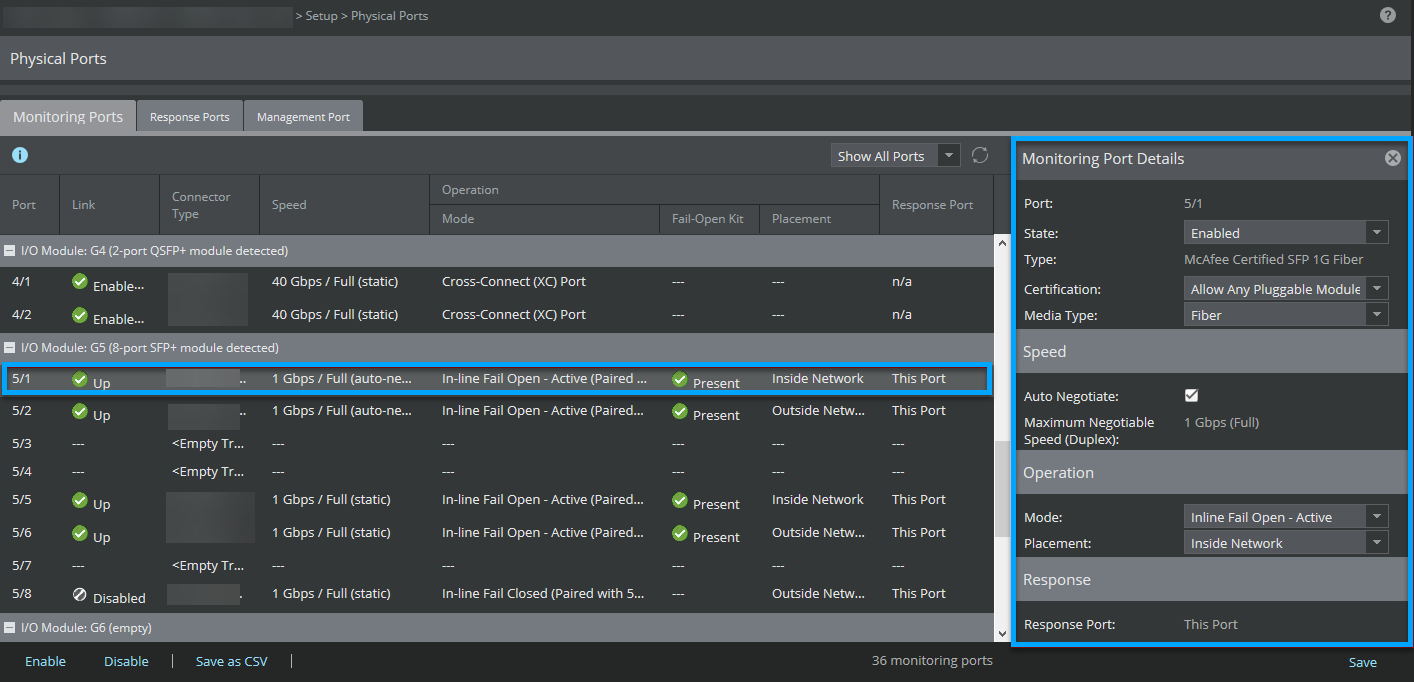
Click Save.
Result: The Sensor and fail-open switch are set up. When traffic passes through the ports, you will notice the port link status changes to Up and turns green.