In the Web UI, choose Settings > Greylist.
The Greylist Settings page appears.
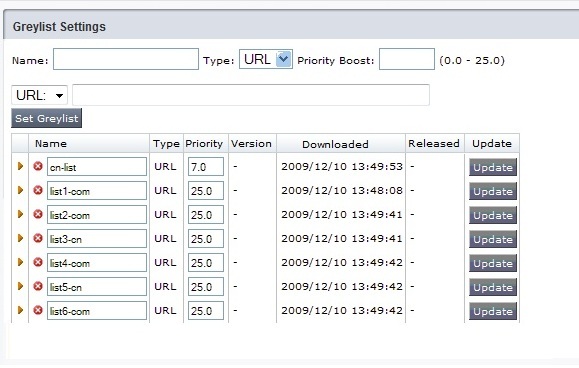
Enter the information for the greylist settings as indicated in the following table.
Field
Description
Name
Name of the greylist.
Type
Choose either URL or File.
Priority Boost
Value for a priority boost (0.0-25.0) that is added to the existing analyzed priorities. A high priority can be assigned to URLs or IP addresses that have a high probability of hosting malware and a low priority to URLs or IP addresses that are not likely to host malware.
To upload the ASCII text greylist file, choose one of the following options:
In the URL box, enter the address of the greylist.
Select File and click Browse.
The file is added to the table on the Greylist Settings page. The validity of the file is verified. For example, if you specify an IP greylist and the file contains URLs, an error is generated.
To display the contents of a greylist file, click the arrow next to the file name.
To rename the greylist file, enter the new name and click Update.
To change the priority, enter the new priority (0.0-25.0) and click Update.
To remove a greylist file, click the X in the red circle to the left of the name.
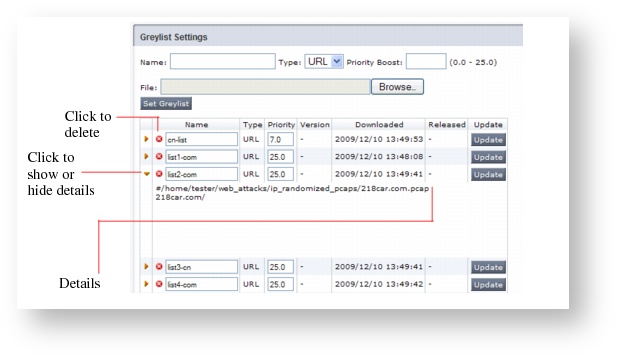
Configuring greylists using the Web UI
- Published on Sep 12, 2026
- 1 minute(s) read
To configure greylist settings:
Was this article helpful?