If there is VLAN,Bridge VLAN or CIDR traffic transmitting across a monitored segment, you can create one or more sub-interfaces. Before creating a sub-interface, the "Interface Type" must be set to VLAN or CIDR in Managing an interface, and you must have already entered VLAN or CIDR IDs.
Note
If you entered IDs that do not flow in the monitored link, the parent interface's policy protects all traffic.
Note
Before creating sub-interfaces, it is important to note that you will not be able to perform the Manage DoS IDs action at the interface level once a sub-interface is created. If you create a sub-interface, then you must utilize Manage DoS IDs at the sub-interface level.
If you added more than one VLAN or CIDR ID to an interface, you can create a sub-interface with one or multiple IDs or you can create multiple sub-interfaces. To create more than one sub-interface, you must repeat the steps that follow.
Task
-
For a standalone Sensor, select
Devices → <Admin Domain Name> → Devices → <Device Name> → IPS Interfaces → <Interface_Name> → Sub-interfaces.
For Sensors in a stack, select Devices → <Admin Domain Name> → Devices → <Device Name> → IPS Interfaces → <Stackname-node id> → <Interface_Name> → Sub-interfaces.
Manage Sub-Interface 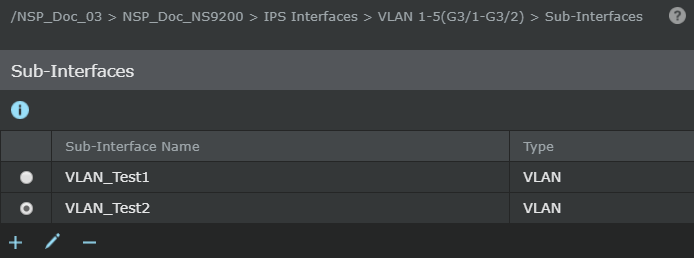
-
Click
.png) .
.
Note
To edit an existing sub-interface, select the sub-interface and click
.png)
; then follow the steps below. To delete a sub-interface, select the sub-interface and click
.png)
; then confirm the deletion.
- Type a Sub-interface Name.
-
Select a policy (Policy Name) to be enforced on the sub-interface(s).
Create Sub-Interface - CIDR 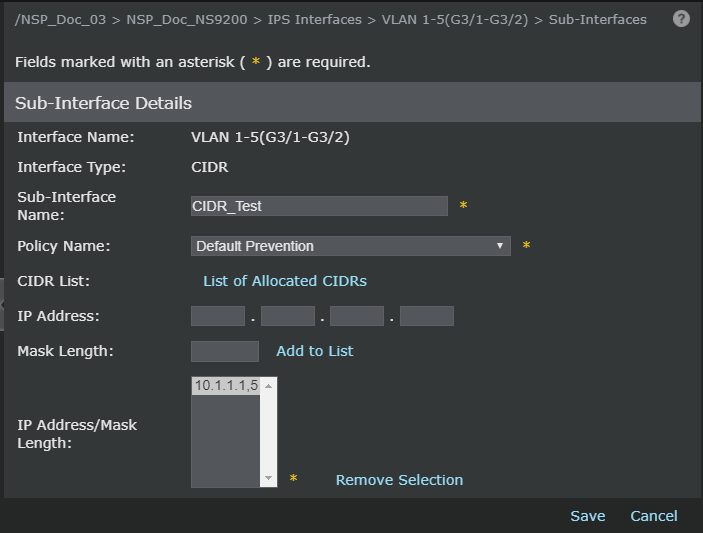
-
Do one of the following:
- For
VLAN and Bridge VLAN move an ID from "Available" to "Allocated" by selecting the ID and clicking the
 button.
- For
CIDR, type the
IP Address and
Mask Length and click
Add to List. A valid CIDR can be from the list you entered on clicking
at
IPS Interface → Interface_Name (For Sensors in stack,
IPS Interface → <Stackname-node id> → Interface_Name), or a CIDR host(s) within a network in your entered list. For example, if you had entered 192.168.3.0/24, you can enter 192.168.3.1/32 and 192.168.3.2/32 here for sub-interface creation.
Note
The CIDR IP address field now enables you to enter IPv4 addresses in 4 different fields separated with dots. You can now enter the IP address value in the corresponding fields.
Note
The maximum value in each field is 255. If you enter ".", you are tabbed to next field.
Note
Only numerical values between 0—9 are allowed. Special characters are not allowed. Pressing tab after the last field tabs you to select mask field.
Note
If you are creating another sub-interface from a CIDR address that has not been allocated, you can check to see which have already been allocated by clicking List of Allocated CIDRs.
- For
VLAN and Bridge VLAN move an ID from "Available" to "Allocated" by selecting the ID and clicking the
-
Click
Save.
The new sub-interface appears in the Sub-Interface List table as well as under IPS Interfaces as a node under the interface node within which it was created.
- Download the changes to your Sensor by clicking Deploy Pending Changes.