---
title: "DoS troubleshooting"
slug: "dos-troubleshooting"
tags: ["Product Usage", "IPS 10.1.10"]
updated: 2026-10-05T15:39:53Z
published: 2026-10-05T15:39:53Z
canonical: "docs.trellix.com/dos-troubleshooting"
---
> ## Documentation Index
> Fetch the complete documentation index at: https://docs.trellix.com/llms.txt
> Use this file to discover all available pages before exploring further.
# DoS troubleshooting
This section lists issues related to DoS alerts.
**Applicable to Sensor models:** M-series, NS-series
## Problem scenario
DoS alerts raised in Trellix IPS Manager.
## Data/Information Collection
1. Execute
show dospreventionprofile <dos-measure-name> <inbound/outbound> in the Sensor.
2. Trace the Sensor files.
## Troubleshooting Steps
1. Check for the source IP of the profile learning each of the packet types. Execute the following commands:
Check the bins for long-term average traffic rate and short-term average traffic rate values. An alert is raised when the short-term traffic rate is higher than the long-term traffic rate. 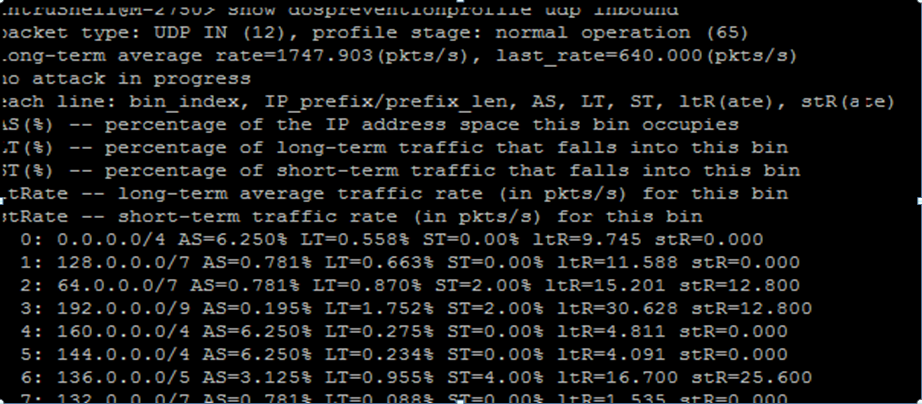
- show dospreventionprofile tcp-syn inbound/outbound
- show dospreventionprofile tcp-syn-ack inbound/outbound
- show dospreventionprofile tcp-rst inbound/outbound
- show dospreventionprofile udp inbound/outbound
- show dospreventionprofile icmp-echo inbound/outbound
- show dospreventionprofile icmp-echo-reply inbound/outbound
- show dospreventionprofile icmp-non-echo-echoreply inbound/outbound
- show dospreventionprofile ip-fragment inbound/outbound
- show dospreventionprofile non-tcp-udp-icmp inbound/outbound
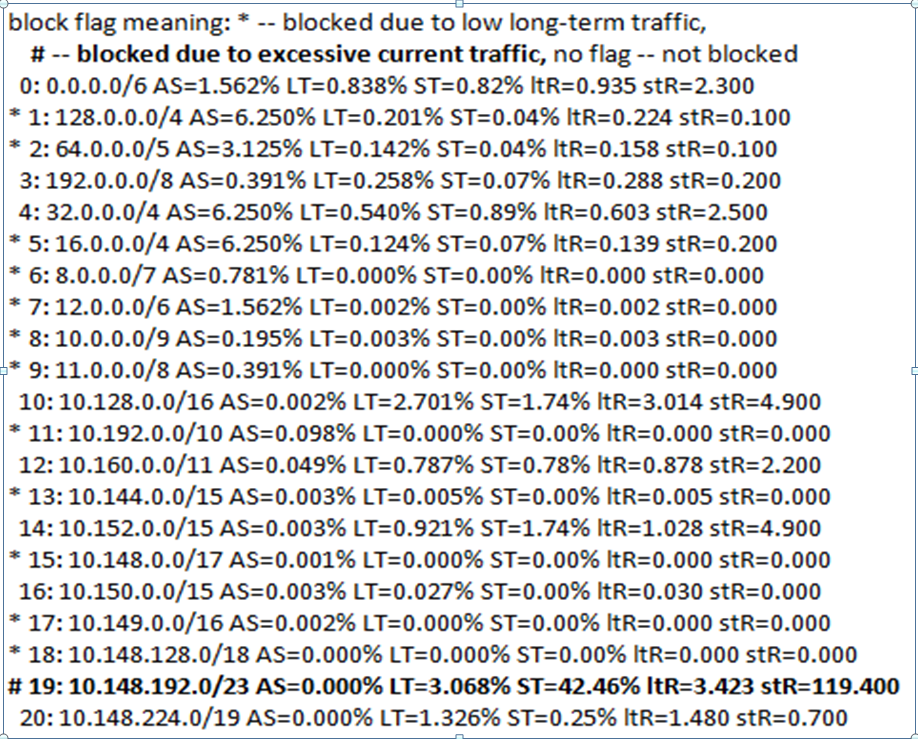
2. Check bins that are blocked. A sample of the source IP profile during the detection stage which indicates the blocked bins is shown in the figure.
3. If many DoS alerts are raised frequently for a particular IP, it could be false positive. The reason could be due to the profile of that IP not studied properly.
4. For volume related alerts (for example, if the inbound UDP volume is too high), check if the IP is missing in the alert details. To check the alert details, navigate to
**Analysis** → **** → **Attack Log** and select the alert by clicking on it twice.
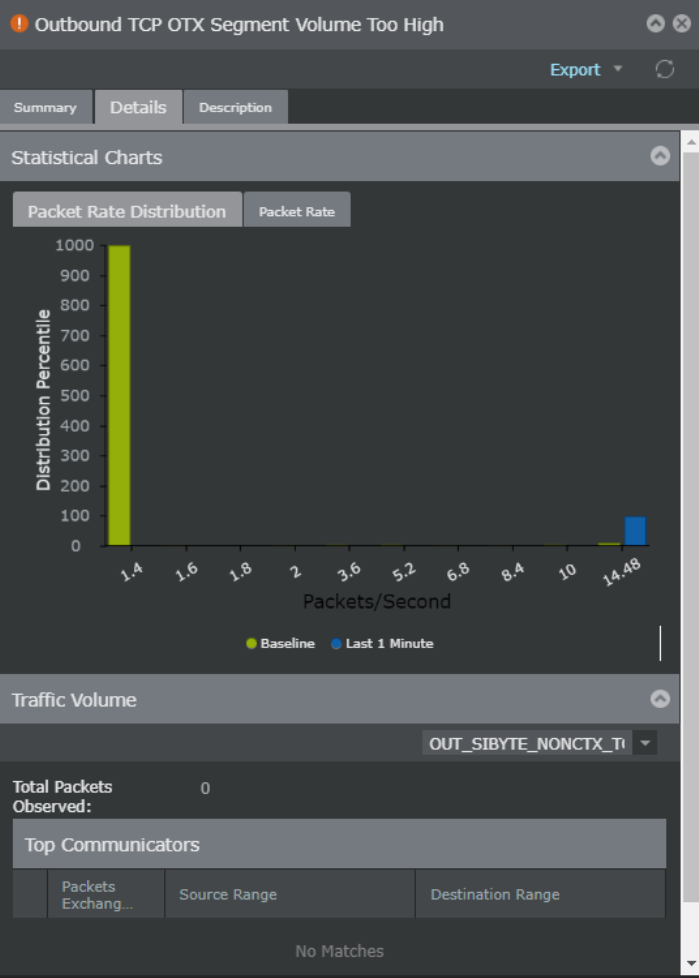
Rebuild the DoS profile to resolve the issue. To rebuild the DoS profile, perform the following steps:
1. Click
**Devices** → **** → **Devices** → **** → **Troubleshooting** → **Denial of Service** → **Data Management**.
2. In the
**DoS Profile Learning** section, select
**Rebuild the DoS Profiles**.
3. Click
**Update**.