We assume that your VPCs and Availability Zones are configured in line with your organization's requirements. The Virtual IPS Sensor can be installed in the same VPC as your instances or in a separate VPC. Before installing the Manager, ensure that you have selected the appropriate region in the AWS console.
For recommendations on the various deployment options, see the topic Use case scenarios.
This section provides the high-level steps for deploying individual Trellix vIPS components in the AWS environment.
Note
For an existing deployment, you will need to redeploy the solution due to design changes for the Controller and vIPS Probe components. Any upgrade is not supported.
Recommendation for deployment:
It is recommended that you follow the steps below to configure Trellix vIPS in the AWS environment. After installing the Manager, you can deploy any of the remaining components.
Trellix recommends you deploy the Sensor in the same Availability Zone or Region as your instances that are to be secured.
For each account you wish to secure, Trellix recommends you create a separate protected group for different accounts. In the event of an attack, this will help in identifying the account that was attacked.
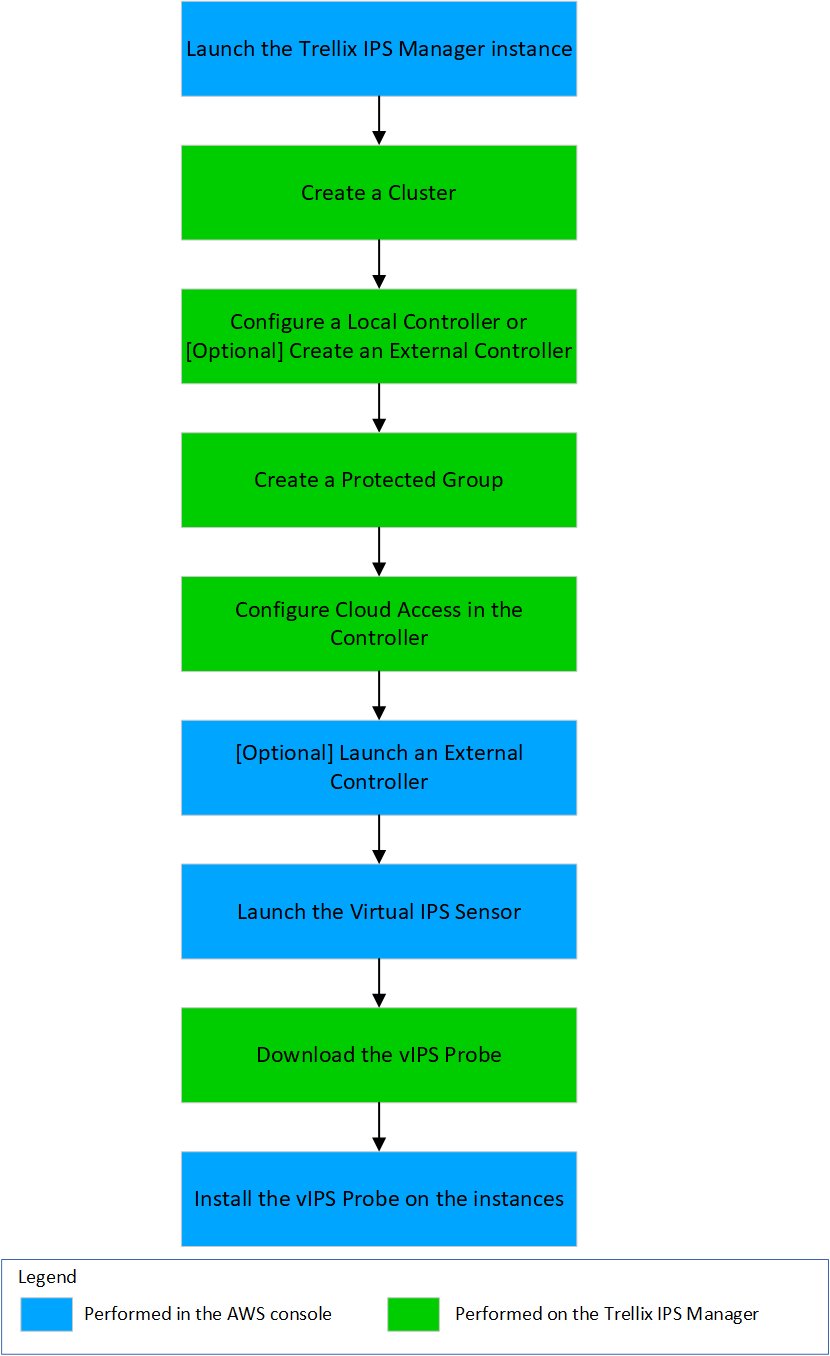
Steps:
Launch the Trellix IPS Manager instance with the appropriate role.
Configure a Cluster for a Protected Group.
Create Protected Groups for instance.
Configure the Local Controller or External Controller based on your requirement for the Protected Group.
Configure Cloud Account in Controller for AWS Cloud Discovery.
(Optional) Launch an External Controller if you have configured the External Controller.
Launch the Virtual IPS Sensor instance.
Once the Sensor instance is active, download and Install the vIPS Probe.
Validate your deployment.
Repeat steps 2-7 in any order to complete the desired deployment.