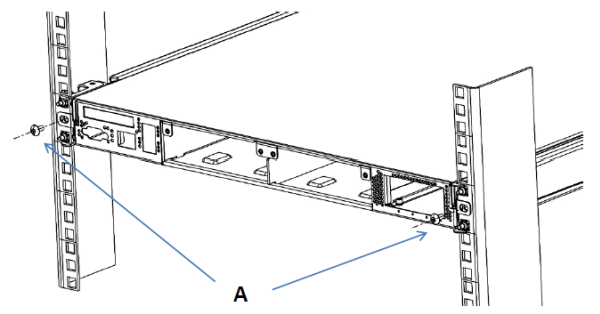
Trellix recommends rack-mounting your Sensor. For maintenance purposes, you must have access to the front and rear of the Sensor.
Caution
Before you mount the Sensor on the rack, make sure that the power is off. Remove the power cable and all network interface cables from the Sensor.
Note
Due to the weight of the appliance, Trellix recommends that two people place the chassis into the rail cabinet.
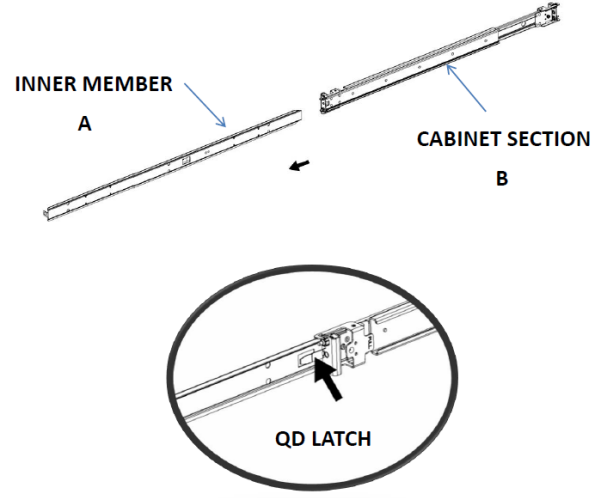
Disassemble the inner slide rail members from the cabinet sections.
Pull the inner member out until it comes to a lock position.
Depress the QD latch to fully disconnect the inner members.
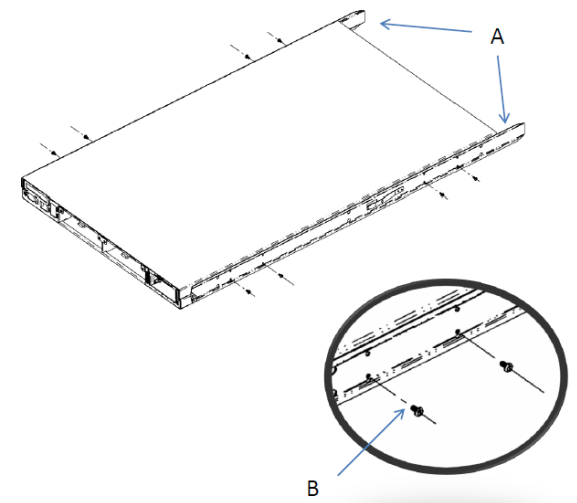
Mount the inner members to the chassis unit.
Place each inner member on both sides of the chassis unit. Position the bottom mounting holes of the inner member with matching mounting holes on chassis unit.
Use screws to secure inner members in place. Apply to both sides of chassis unit.
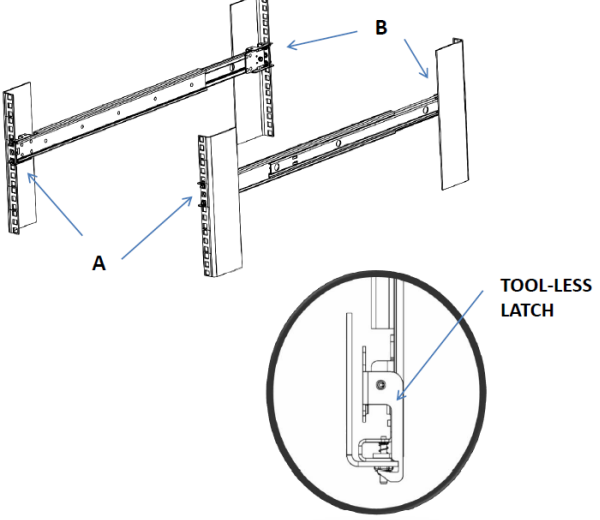
Mount the slide cabinet sections to the rack.
Install the front end of each slide cabinet section to the rack using the slide tool-less features. The tool-less latch rotates when the bracket is pressed up against the rack rails.
Align, adjust, and attach the rear brackets to the rack rail.
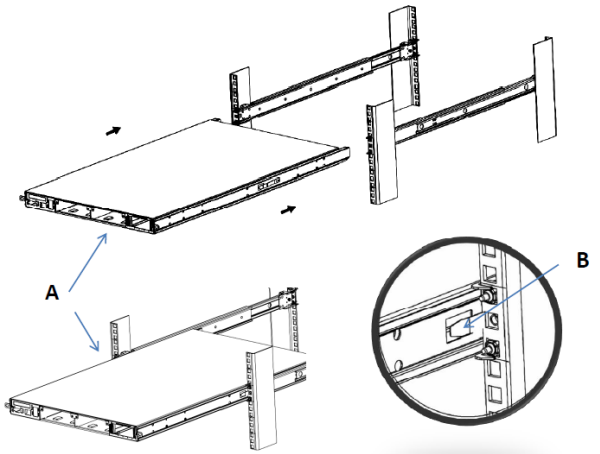
Mount the chassis unit into the mounted cabinet sections.
Guide the chassis unit into the pre-installed cabinet sections. Allow the pre-installed inner members to slide into the outer members until they lock in place.
Depress the QD latch on both sides and continue to push the chassis unit in until fully closed.
Secure the chassis unit through the rack rails.
With the chassis unit in a fully closed position, secure using two truss head screws.
Drive the screws through the inner member flange and through the rack rails. The screws thread directly to the cabinet slide members. Tighten the screws.