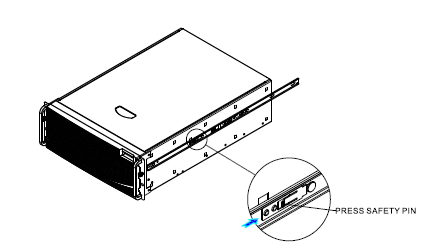
Trellix recommends rack-mounting your Sensor. For maintenance purposes, you must have access to the front and rear of the Sensor.
Caution
Before you mount the Sensor on the rack, make sure that the power is off. Remove the power cable and all network interface cables from the Sensor.
Note
Due to the weight of the appliance, Trellix recommends that two people place the chassis into the rail cabinet.
Pull the release button to remove inner member from slides.
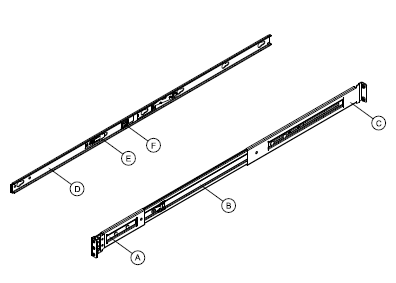
Slides components:
A ‑ front bracket
B ‑ outer member
C ‑ rear bracket
D ‑ inner member
E ‑ safety locking pin
F ‑ release button
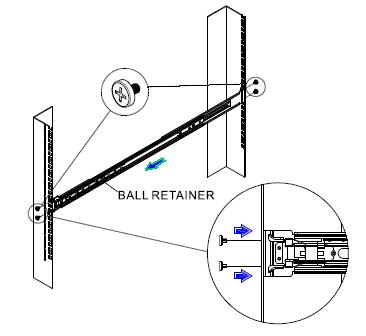
Align the brackets to appropriate vertical position on the rack and insert the fasteners. Move the ball retainer to the front of the slides.
Align the inner member key holes to the standoffs on the chassis, then move the inner member toward the front of the chassis.
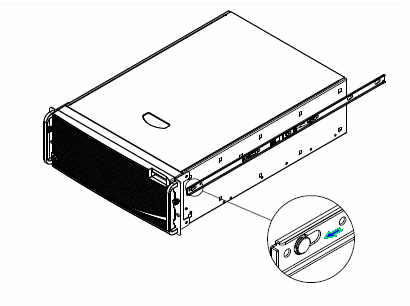
Pull the release button on the inner member to release the lock and allow the chassis to close.
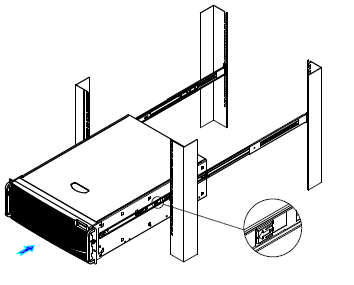
Install a Sensor into the rack.
Optionally, you can also mid-mount the Sensor.
Fully extend the slides until it is in the locked position, then pull the release button to release the lock and disconnect the inner member from the slides.
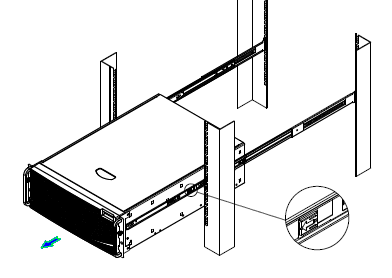
Press the safety locking pin to release the inner member from the chassis.