Before you begin
If you are using Central Manager, it must be upgraded to 10.1 before you upgrade the Manager.
Your current Trellix IPS infrastructure meets all the requirements discussed in Reviewing the upgrade requirements.
If you want to upgrade the RAM on the Manager server, make sure you do that before you begin the Manager upgrade.
You have reviewed and understood the implications of the upgrade considerations discussed in Reviewing the Upgrade Considerations.
You have backed up your current Manager data. See Performing a database backup.
As a best practice, make sure all the devices are communicating with the Manager and your deployment is working as configured. This ensures that you do not upgrade with any existing issues.
You have the latest 10.1 Manager installable file at hand. You can download it from the Trellix Download Server.
Note
In some cases, you may be redirected to Trellix Enterprise Download Server. You can, however, download the installer from this server.
You have your Manager database root password available.
You have stopped all third-party applications such as Security Information and Event Management (SIEM) agents. It is especially important that you stop any such third-party application that communicates with the Manager database. The Manager cannot upgrade the database if the database is actively communicating with another application.
Important
If this is an upgrade of a Manager in an MDR pair, then you should switch the primary Manager to standby mode before you upgrade. Make sure you are following the steps in MDR Manager upgrade.
The following are the tasks to upgrade a standalone Manager.
Task
Stop the Manager service.
Right-click on the Manager icon at the bottom-right corner of your server and stop the service. Alternatively, go to Windows Control Panel → Administrative Tools → Services. Then right-click on Trellix IPS Manager and click Stop.
Stop the Trellix IPS Manager Watchdog service using the same method as described to stop the Manager service.
Note
Make sure the Trellix IPS Manager Database service remains started.
Exit the Manager tray from the Windows Task Bar.
Move any saved report files and alert archives from the server to some other location.
The reports are saved at <Manager_Install_Dir>\REPORTS folder. The alert archives are saved at <Manager_Install_Dir>\App\alertarchival folder.
Run the 10.1 Manager executable.
Close all applications communicating or running on the Windows server. Ensure that you have closed all applications and temporarily disabled any 3rd-party process, such as SIEM agents, that might be communicating with the Manager. The manager installer wizard displays the following warning message to recommend you to close all the applications.
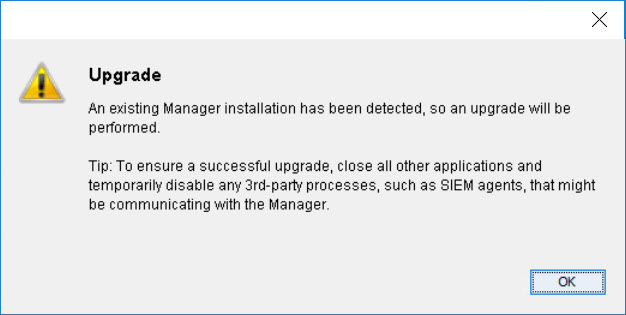
At the end of the upgrade process, you might be required to restart the server. If prompted, it is highly recommended that you restart the server.
Select Yes, restart my system to restart the server immediately.
Select No, I will restart my system myself to complete the upgrade process without restarting the server. You can restart the server at a later point in time. Clicking Done in the Manager Installation Wizard will start the Manager services.
During the upgrade, you might have been prompted to run the Apache Solr script on the Manager server. After the upgrade is complete, run the script only if you had been prompted to do so.
Log in to the Manager.
You can verify the version in the Dashboard page.
Go to Manager → <Admin Domain Name> → Troubleshooting → Logs. Check the Faults tab to ensure that the Manager is up.
Refer to the following sections and complete those tasks.
Make sure the Manager contains the latest 10.9.x signature set.
Upgrade the Sensor software with the latest 10.9.x signature set. See Performing Signature Set and Sensor Software upgrade.
Note
The default Manager root directory for App, MariaDB, and Solr will be moved from <System_Drive>\Program Files\McAfee\Network Security Manager to <System_Drive>\Program Files\Trellix\IPS Manager. In such scenarios, the Manager installer will prompt this directory change window.
The customized root directory will remain the same.