Before you begin
A Sensor which
- Is set up and has established trust with a Manager
- Has a free port pair that can be deployed in inline fail-open configuration
- SFPs or XFPs, depending on the Sensor model and fail-open switch model
Note
The steps below assume you are using an M-Series Sensor when selecting ports.
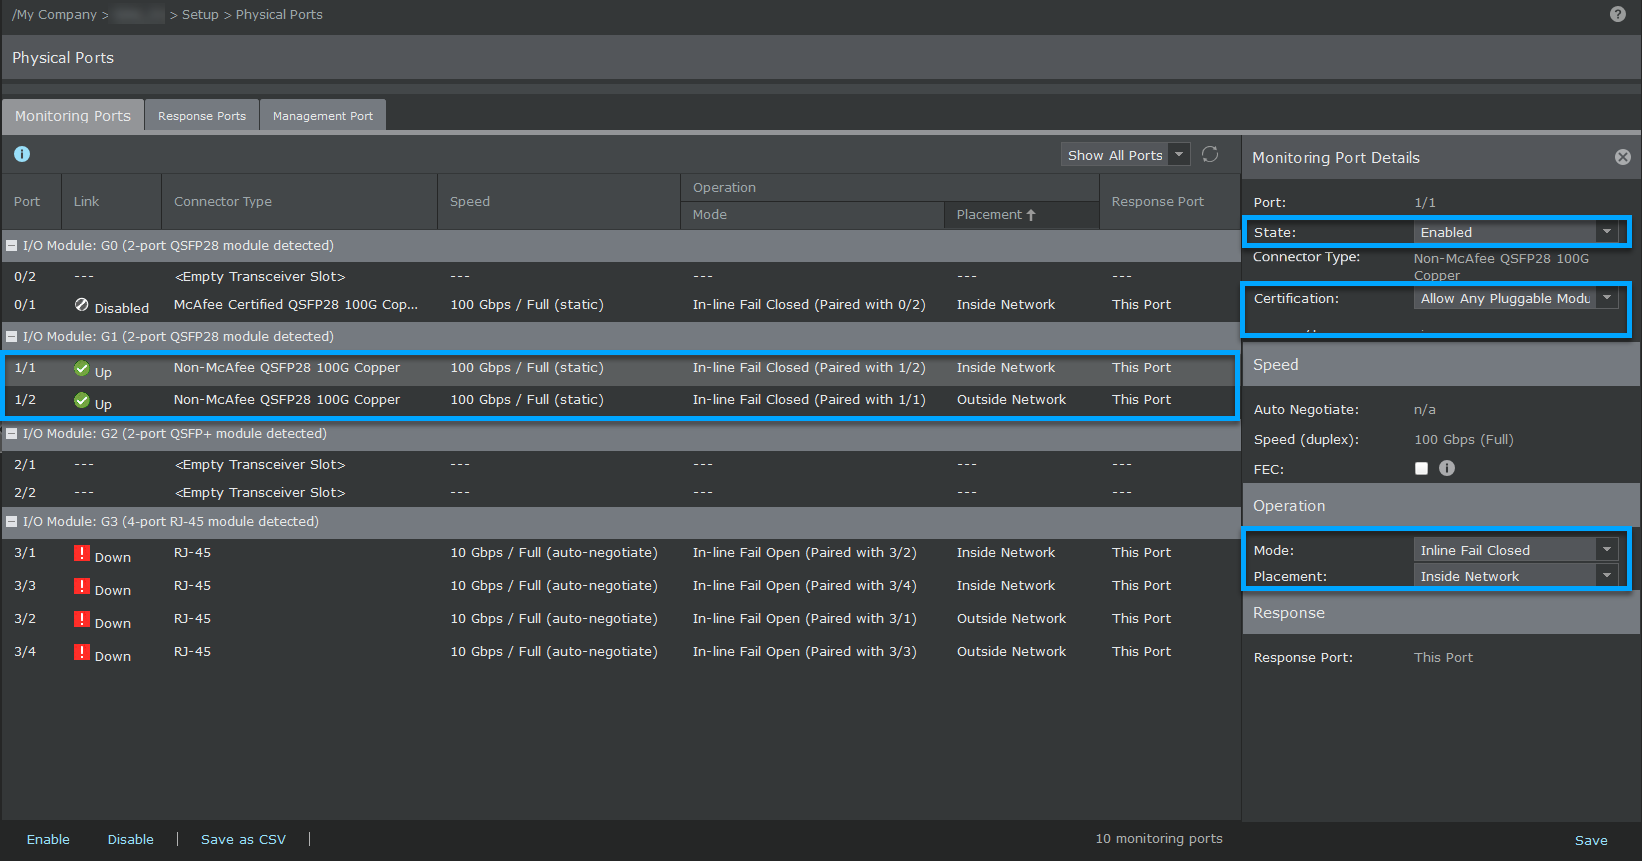
To configure a fail-open switch you must configure the port pair to operate as an inline fail-open port.
Task
- After cabling the Sensor and the fail-open switch, log on to your Manager.
- Go to Devices → <Admin Domain Name> → Devices → <Device_Name> → Setup → Physical Ports.
-
Double-click port
1A.
A configuration window appears on the right side of the window.
-
Click the
State drop-down and select
Enabled.
This enables port 1A-1B.
-
Select the
Auto Negotiate checkbox and make sure the
Speed (Duplex) is set to
1 Gbps (Full).
In case of the 4-port RJ-45 module, the maximum Speed (duplex) can be set to 10 Gbps (Full). When you set the Speed (duplex) to 10 Gbps (Full), the link will come up only when the Auto Negotiate option is ON. To this effect, the Auto Negotiate checkbox automatically gets selected and disabling the Auto Negotiate option is not allowed.
-
Click the
Mode drop-down and select
Inline Fail Open – Active.
This means port pair 1A-1B is now configured for inline fail-open.
-
Click the
Placement drop-down and select
Inside Network or
Outside Network, depending on how you want to configure your ports.
Placement refers to the area of the network which that individual port is connected.
-
Click the
Response Port drop-down and select the right port that you want to assign.
For an inline fail-open or fail-closed setup, you can configure the same port to be the response port.
- Click Save.