Before you begin
Before configuring the URL reputation in the Manager, perform the following steps:
- If you are using GTI public cloud, enable Telemetry and Domain Name Resolution (DNS).
- For information on enabling Telemetry, see the Configure Telemetry section in the Trellix Intrusion Prevention System Integration Guide.
- To enable DNS in the Manager, perform the following steps:
- In the Manager, select the Devices tab.
- Go to, <Domain Name> → Global → Common Device Settings → Name Resolution.
- Select the Enable Name Resolution? checkbox.
- Enter the details of the DNS servers.
- Click Test Connection to verify the connection.
- Click Save to save the changes.
Note
If you are using GTI private cloud, configuring Telemetry and DNS is not mandatory.
-
You should have the name resolution configuration that allows the Sensor to resolve the hostname of the server that hosts the URL database.
Perform the following steps to enable URL reputation in the Manager:
Task
- In the Manager, select the Policy tab.
- Go to, <Domain Name> → Intrusion Prevention → Policy Types → Inspection Options.
- Select the required policy and clone it.
- Double-click the cloned policy.
- Select the GTI Reputation Services tab. The Endpoint and URL tabs are displayed.
-
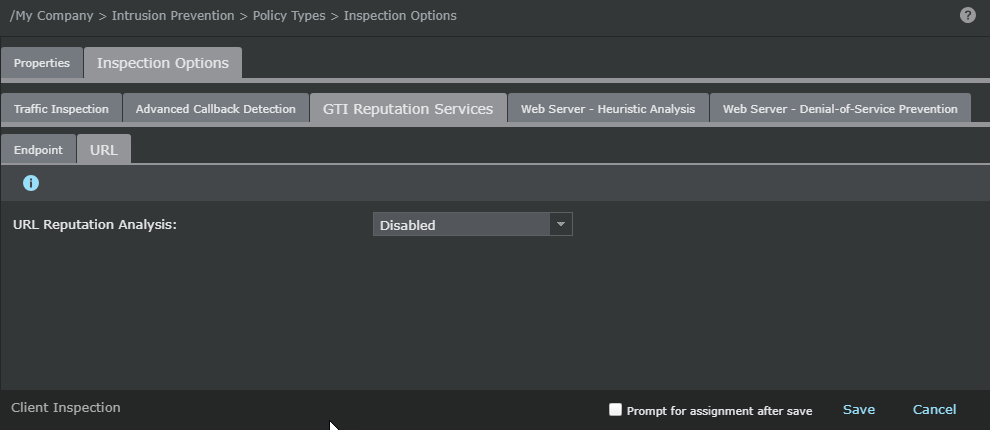
Select the
URL tab.
-
Select a value in the
URL Reputation Analysis field. The value can be any one of the following:
- Disabled - Disable the URL reputation feature
- Inbound and Outbound - Enable URL reputation for both inbound and outbound traffic
- Inbound Only - Enable URL reputation only for inbound traffic
- Outbound Only - Enable URL reputation only for outbound traffic
Note
By default, URL Reputation is disabled for a policy.
Note
Make sure to enable Layer 7 Data Collection in Traffic Inspection tab when URL Reputation Analysis is enabled.
-
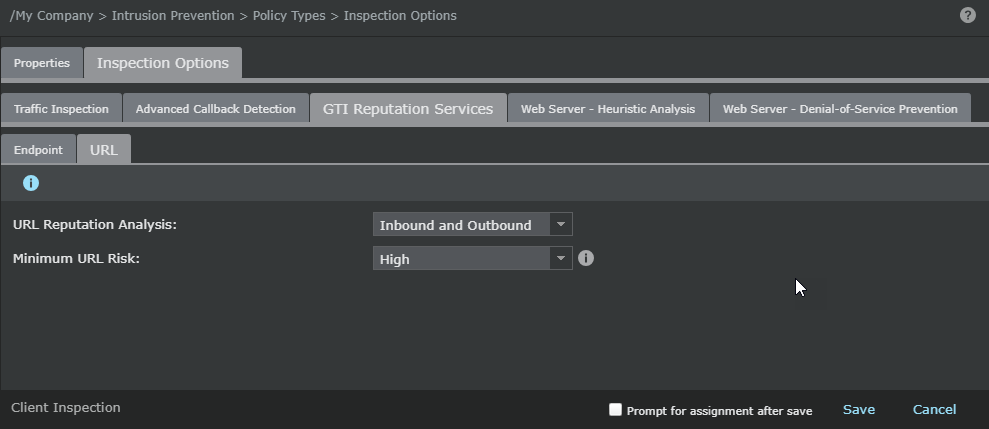
Select the
Minimum URL Risk. The value can be any one of the following:
- Medium
- High
Note
- The default selection is High.
- If the selection is Medium, alerts are generated for both High-risk and Medium-risk URLs. If the selection is High, alerts are generated only High-risk URLs.
- Click Save.
-
Publish the changes to the Sensor. Select
Devices → <Domain Name>
→ Devices → <Device> → Deploy Pending Changes and click
Deploy.
Note
For configuring various Sensor response actions, see Trellix Intrusion Prevention System Product Guide.