Before you begin
To integrate the Private GTI Cloud for URL and IP Reputation with Trellix IPS, you need to have the following:
- The IP address for the Private GTI Cloud server.
- ZIP file that contains the following files in the .pem format:
- Trellix IPS certificate
- Private key for Trellix IPS certificate
- GTI Private Cloud CA certificate
- Name resolution configuration that allows the Sensor to resolve the hostname of the server that hosts the URL database.
To integrate with Private GTI Cloud for URL and IP Reputation, you need to configure Private Cloud Server settings to communicate with the Private GTI Cloud. By default, Trellix IPS is configured to communicate with the Trellix Global Threat Intelligence server.
Complete the following steps to configure the GTI Private Server for URL and IP Reputation:
Task
-
Select
Manager → <Admin Domain Name> → Integration → GTI and select
Endpoint/URL Reputation.
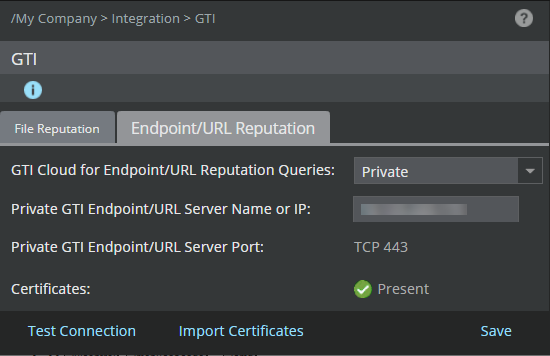
- In the GTI Cloud for Endpoint/URL Reputation Queries, select Private.
- Enter the Private GTI Endpoint/URL Server Name or IP.
-
The Private GTI Cloud for URL and IP Reputation uses certificates to authenticate solutions that want to consume its services. Click
Import Certificates to import the following certificate files:
- Trellix IPS certificate
- Private key for Trellix IPS certificate
- Private GTI Cloud CA certificate
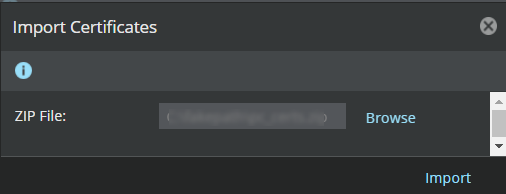
The Import Server Certificate dialog box opens.
Note
The certificate files and the client private key should be in the .pem format.
The Private GTI Cloud for URL and IP Reputation uses the Trellix IPS certificate and private key to authenticate Trellix IPS.
The Trellix IPS uses the Private GTI Cloud CA certificate to authenticate Private GTI Cloud.
- Click Browse.
- Select the .zip file that contains the files.
-
Click
Import.
Once the import is complete, the Manager validates the files. If the validation is successful, the Private GTI Cloud Server Certificate Status will be displayed as

-
Click
Save.
The Manager pushes the Private GTI Cloud for URL and IP Reputation configurations to the Sensors connected to the Manager.