You can use this page to import hashes into the allow and block list.
Supported file formats include XML and CSV. The XML format is used to import a list of hashes that have been exported from endpoints running McAfee EIA using the Endpoint Baseline Generator utility. The Manager exports the lists in CSV format, so CSV can be used to import previous exports. It also provides a straightforward way to create a list manually.
CSV file format
The file to be imported should be in the following CSV format:
<File name>,<File size>,<Hash type>,<File hash>,<Description>. For example:
Application.exe, 1024, MD5, 30a4edd18db6dd6aaa20e3da93c5f425, My description where:
Application.exe is the file name. File name must be a string value and at least 1 character long.
1024 is the file size. File size must be an integer value and at least 1 character long. It is not currently used.
MD5 is the hash type. Hash type can only be MD5.
30a4edd18db6dd6aaa20e3da93c5f425 is the file hash. File hash must be a valid MD5 hash value.
My description is the description. Description must be a string value and at least 1 character long.
If you are importing multiple files, each file has to be on a new line.
Once hashes are imported, the list of all available hashes is displayed. The Manager pushes all the imported hashes to all the available NTBA Appliances and the IPS Sensors. The auto-allowed and auto-blocked executable hashes are added to the Manager global list. The Comment column on the Policy → <Admin Domain Node> → Intrusion Prevention → Exceptions → File Hashes page provides details for the same.
Note
The Manager supports up to 99,000 hash entries (allowed and blocked combined).
Task
Select Policy → <Admin Domain Node> → Intrusion Prevention → Exceptions → File Hashes.
The Allowed and Blocked Hashes tabs are displayed.
Note
You can also go to the File Hashes page by clicking the Manage allow and block lists link from the Malware Files page or the Endpoint Executables page.
Depending on the type of hashes you want to import, select the Allowed Hashes or the Blocked Hashes tab.
Tip
View Comment for auto-allowed and auto-blocked executables and decide to import the hashes.
Click Import.
The Import page is displayed.
Importing hashes into the allow list
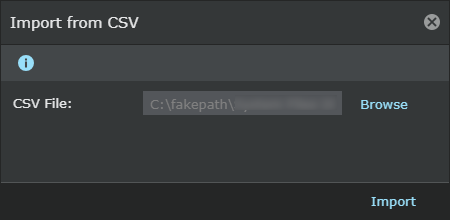
Browse to the location of the file and click Import. The list is populated.
Note
By default, the list is sorted in the ascending order of the file name. To sort it according to your choice, you can click any of the column name and select an option from the drop-down list.
You can append to the existing list by clicking the Append option, which is selected by default.
Note
For information about how to use the Replace option, see the section Remove or replace hashes from allow and block lists.
Use the Search option to locate an entry by the file hash, file name, or classifier.
You can consider adding a description in the Comment field as to why a file hash was allowed or blocked.
Note
The Comment field allows up to 250 characters.