The following steps describe how to add stacked NS9500 Sensors to the Manager:
Start the Manager software.
Log in to the Manager (the default username is
adminand the default password isadmin123).To add stacked Sensors in the Manager, click Devices → <Admin Domain> → Global → Device Manager, then select Stacks tab.
The Stacks tab is displayed.
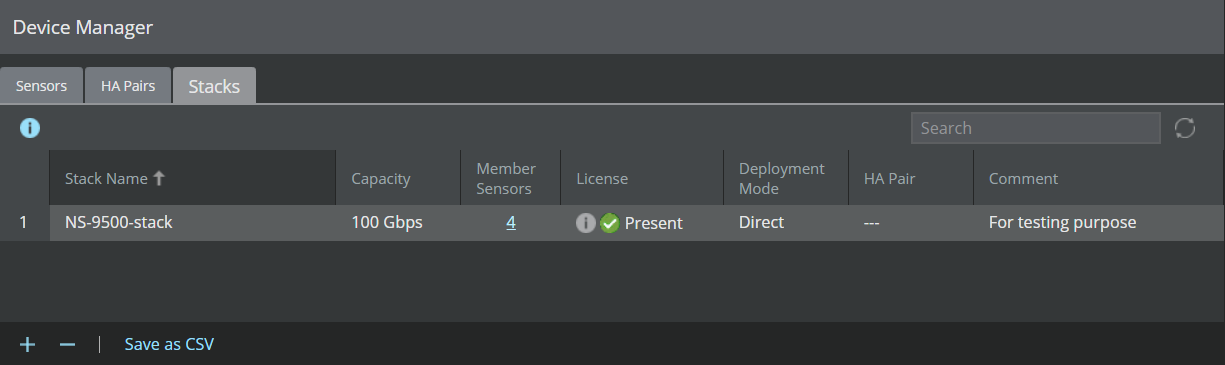
Click
.png) to add a new stack.
to add a new stack.The Stack Details window opens.
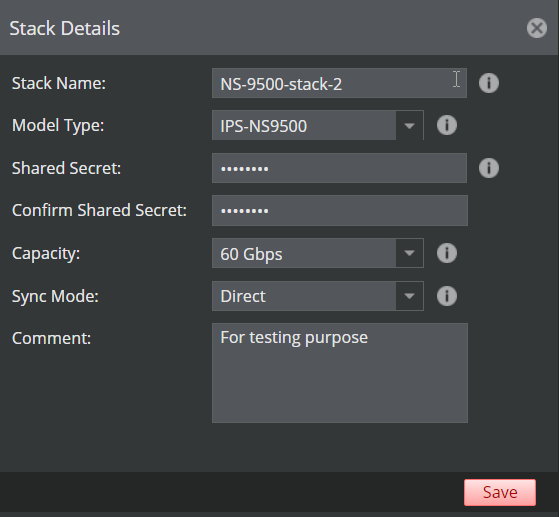
Enter the following mandatory information in the appropriate fields.
Stack Name — The stack name must begin with a letter. The maximum length of the name is 25 characters, including numbers, hyphens, underscore, periods, and letters.
Model Type — Choose the Sensor model for stacking. Available options are: IPS-NS9500 and IPS-NS9600. Choose IPS-NS9500.
Shared Secret — The shared secret must be a minimum of 8 characters and maximum of 25 characters in length. The key cannot start with an exclamation mark nor can have any spaces. The parameters that you can use to define the key are:
26 alphabets: Uppercase and lowercase (A, B, C,...Z and a,b,c,...z)
10 digits: 0 1 2 3 4 5 6 7 8 9
31 symbols: ~ ` ! @ # $ % ^ & * ( ) _ + ‑ = [ ] { } \ | ; : " ' , . < /
Note
The Sensor stack name and node ID and shared secret key that you enter in the Manager must be identical to the shared secret that you will later enter during physical installation or initialization of the Sensor (using CLI). If not, the Sensor will not be able to register itself with the Manager.
Confirm Shared Secret — Confirm the shared secret key.
Capacity — Configure the throughput for the stack.
If you have selected IPS-NS9500 as the Model Type, the number of Sensors will differ based of the throughput selected. See the table below:
Capacity
Number of Sensors in the stack
40 Gbps
2
60 Gbps
2
100 Gbps
4
Sync Mode — Select Direct or Indirect.
Note
Selecting Indirect enables Offline Sensor update. Direct is the default mode.
Comment — (Optional) Enter any comments about the stack being added.
Click Save.
An informational message window appears showing the names of the member Sensors in the stack. Click OK to confirm the changes.
A warning pop-up appears on screen, if there is no valid license assigned to the stack being configured. Click OK to proceed with the license assignment task.
.jpg)
Capacity license for: <stack name> window appears, showing a list of the licenses in use by the stack (if any) ,with details such as Grant ID, Capacity, Key, and Expiration.
Assign or Change license for <stack name> window appears. Select the required capacity license(s) from the list of licenses already added to the Manager and click Assign.
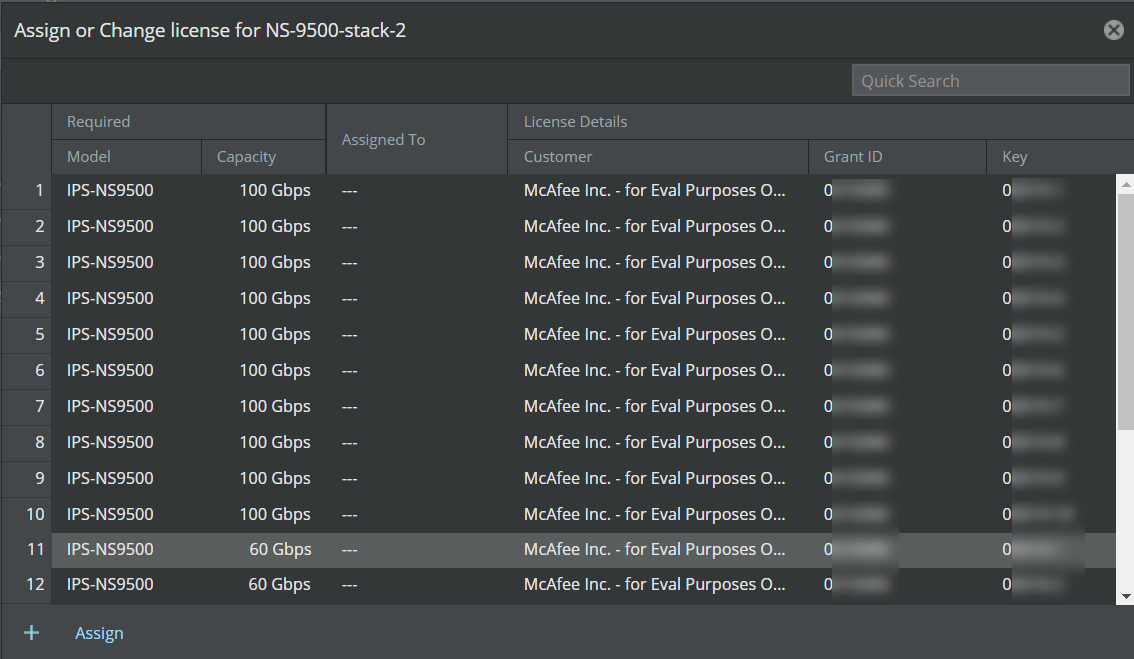
If you need to add the required license(s) to the Manager, click
and follow the steps outlined in Add a license to the Manager. Once added to the Manager, assign the required license(s) to the stack.An informational message appears showing that the required license(s) have been added to the stack. Click OK.
Note
Alternatively, you can add and assign required licenses to stacked NS9500 Sensors from the Manager → <Admin Domain> → Setup → Licenses page, or, using the
.jpg) icon under the License field of the required stack on the Stacks tab of the Device Manager page.
icon under the License field of the required stack on the Stacks tab of the Device Manager page.The new stack in displayed on the Stacks tab.
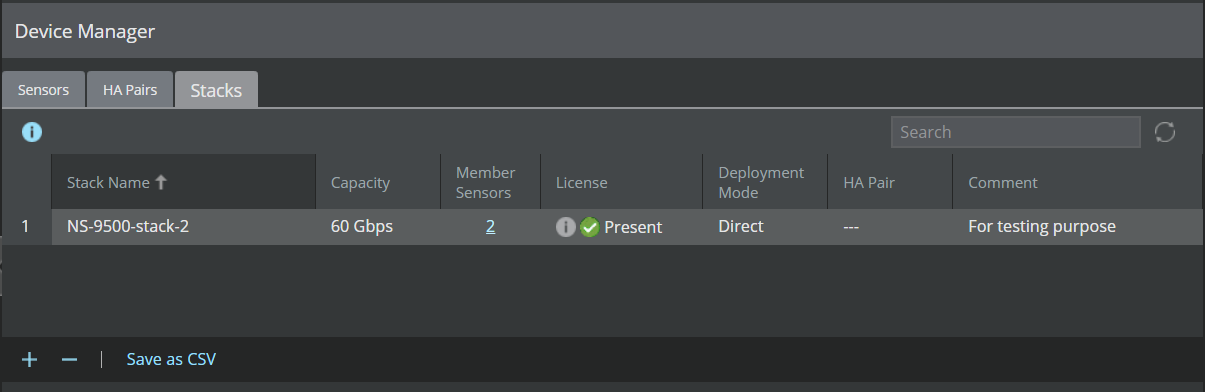
You must manually push the configuration after the license is assigned to the stack. For more information on licenses, see Managing licenses for NS9500 Sensors.
Close the Manage Stacks window.
In the Device Manager page, the member Sensor instances are displayed as <Stackname-node id> (for example, <Stackname-1>, <Stackname-2>, etc.) depending on the capacity.
Capacity
Sensor name
40 Gbps
<Stackname-1>
<Stackname-2>
60 Gbps
<Stackname-1>
<Stackname-2>
100 Gbps
<Stackname-1>
<Stackname-2>
<Stackname-3>
<Stackname-4>
Using the Sensor CLI, configure the Sensors with the same name and node ID as the names displayed in the Device Manager page.