After the migration completes, log in to the appliance and change the default administrator credentials before performing the initial network configuration.
Log in with the default username and password (admin/admin).
Run the enable command, followed by the configure terminal command, to enter configuration mode.
hostname > enable hostname # configure terminal
Change the default admin user password using the following command:
hostname (config) # username admin password <new-password>
Log in with the new admin credentials and accept the End User License Agreement (EULA).
Configure the following network settings in CLI console:
Steps
Response
Hostname?
Enter the hostname for the appliance.
Admin password?
Enter a new administrator password. The new password must be at least 8 characters. You can skip this step if you have already changed your administrator password.
Enable remote access for ‘admin’ user?
Enter yes to enable the administrator to log in to the appliance remotely. Enter no to disable remote access.
Use DHCP on ether1 interface?
Enter yes to use Dynamic Host Configuration Protocol (DHCP) to configure the appliance IP address and other network parameters. Enter no to manually configure your IP address and network settings. If you enter yes, proceed to the Default gateway step.
Use zeroconf on ether1 interface?
Enter yes to use zero-configuration (zeroconf) networking on the ether1 interface.
Note
Do not use zeroconf on the primary interface.
Primary IPv4 address and masklen?
Enter the IP address in A.B.C.D format and the network mask for the management interface, for example, 10.10.1.1 /24 or 10.10.1.1 255.255.255.0.
Default gateway?
Enter the gateway IP address for the management interface.
Primary DNS server?
Enter the IP address of the DNS server.
Domain name?
Enter the domain for the management interface.
Enable fenet service?
Enter yes to enable FireEye Network (fenet) services. If you enter no, proceed to the Enable NTP step.
Enable fenet license update service?
Enter yes to enable the license update service for fenet. If you enter no, proceed to the Enable NTP step.
Sync appliance time with fenet?
Enter yes to synchronize the appliance time with fenet service. If you enter no, the appliance will not synchronize with fenet.
Enable NTP?
Enter yes to use the default Network Time Protocol (NTP) servers to enable automatic time synchronization. Enter no to manually set the time and date on the appliance. (This step is skipped if you enter yes in the "Sync appliance time with fenet?" step)
Enable IPv6 on ether1 management interface
Enter yes to enable the IPv6 protocol in addition to IPv4.
Product license key
Once the system retrieves an IP address and the fenet services are enabled, the product license key is automatically applied.
Note
If the license is not configured in the network, contact Trellix Support.
Security content updates key
Once the system retrieves an IP address and the fenet services are enabled, the security content license key is automatically applied.
Note
If the license is not configured in the network, contact Trellix Support.
Submission: Interface
Press Enter to use ether1 as the submission interface.
Cluster: Interface
Press Enter to use ether1 as the cluster interface. Otherwise, enter the name of the other interface such as ether2, ether3 or ether4.
Send a request to be managed by CMS
Enter yes only if the appliance is managed by Trellix Central Management System (CMS).
Verify IVX license status
Systems with internet access and fenet services enabled in the firewall automatically retrieve the license.
Verify whether the system is licensed or not using the show version command.
hostname > show version
View the list of systems with licenses installed:
hostname > enable hostname # configure terminal hostname (config) # show licenses
Verify whether the system retrieves the following licenses:
FireEye Appliance
FireEye Support
Content updates
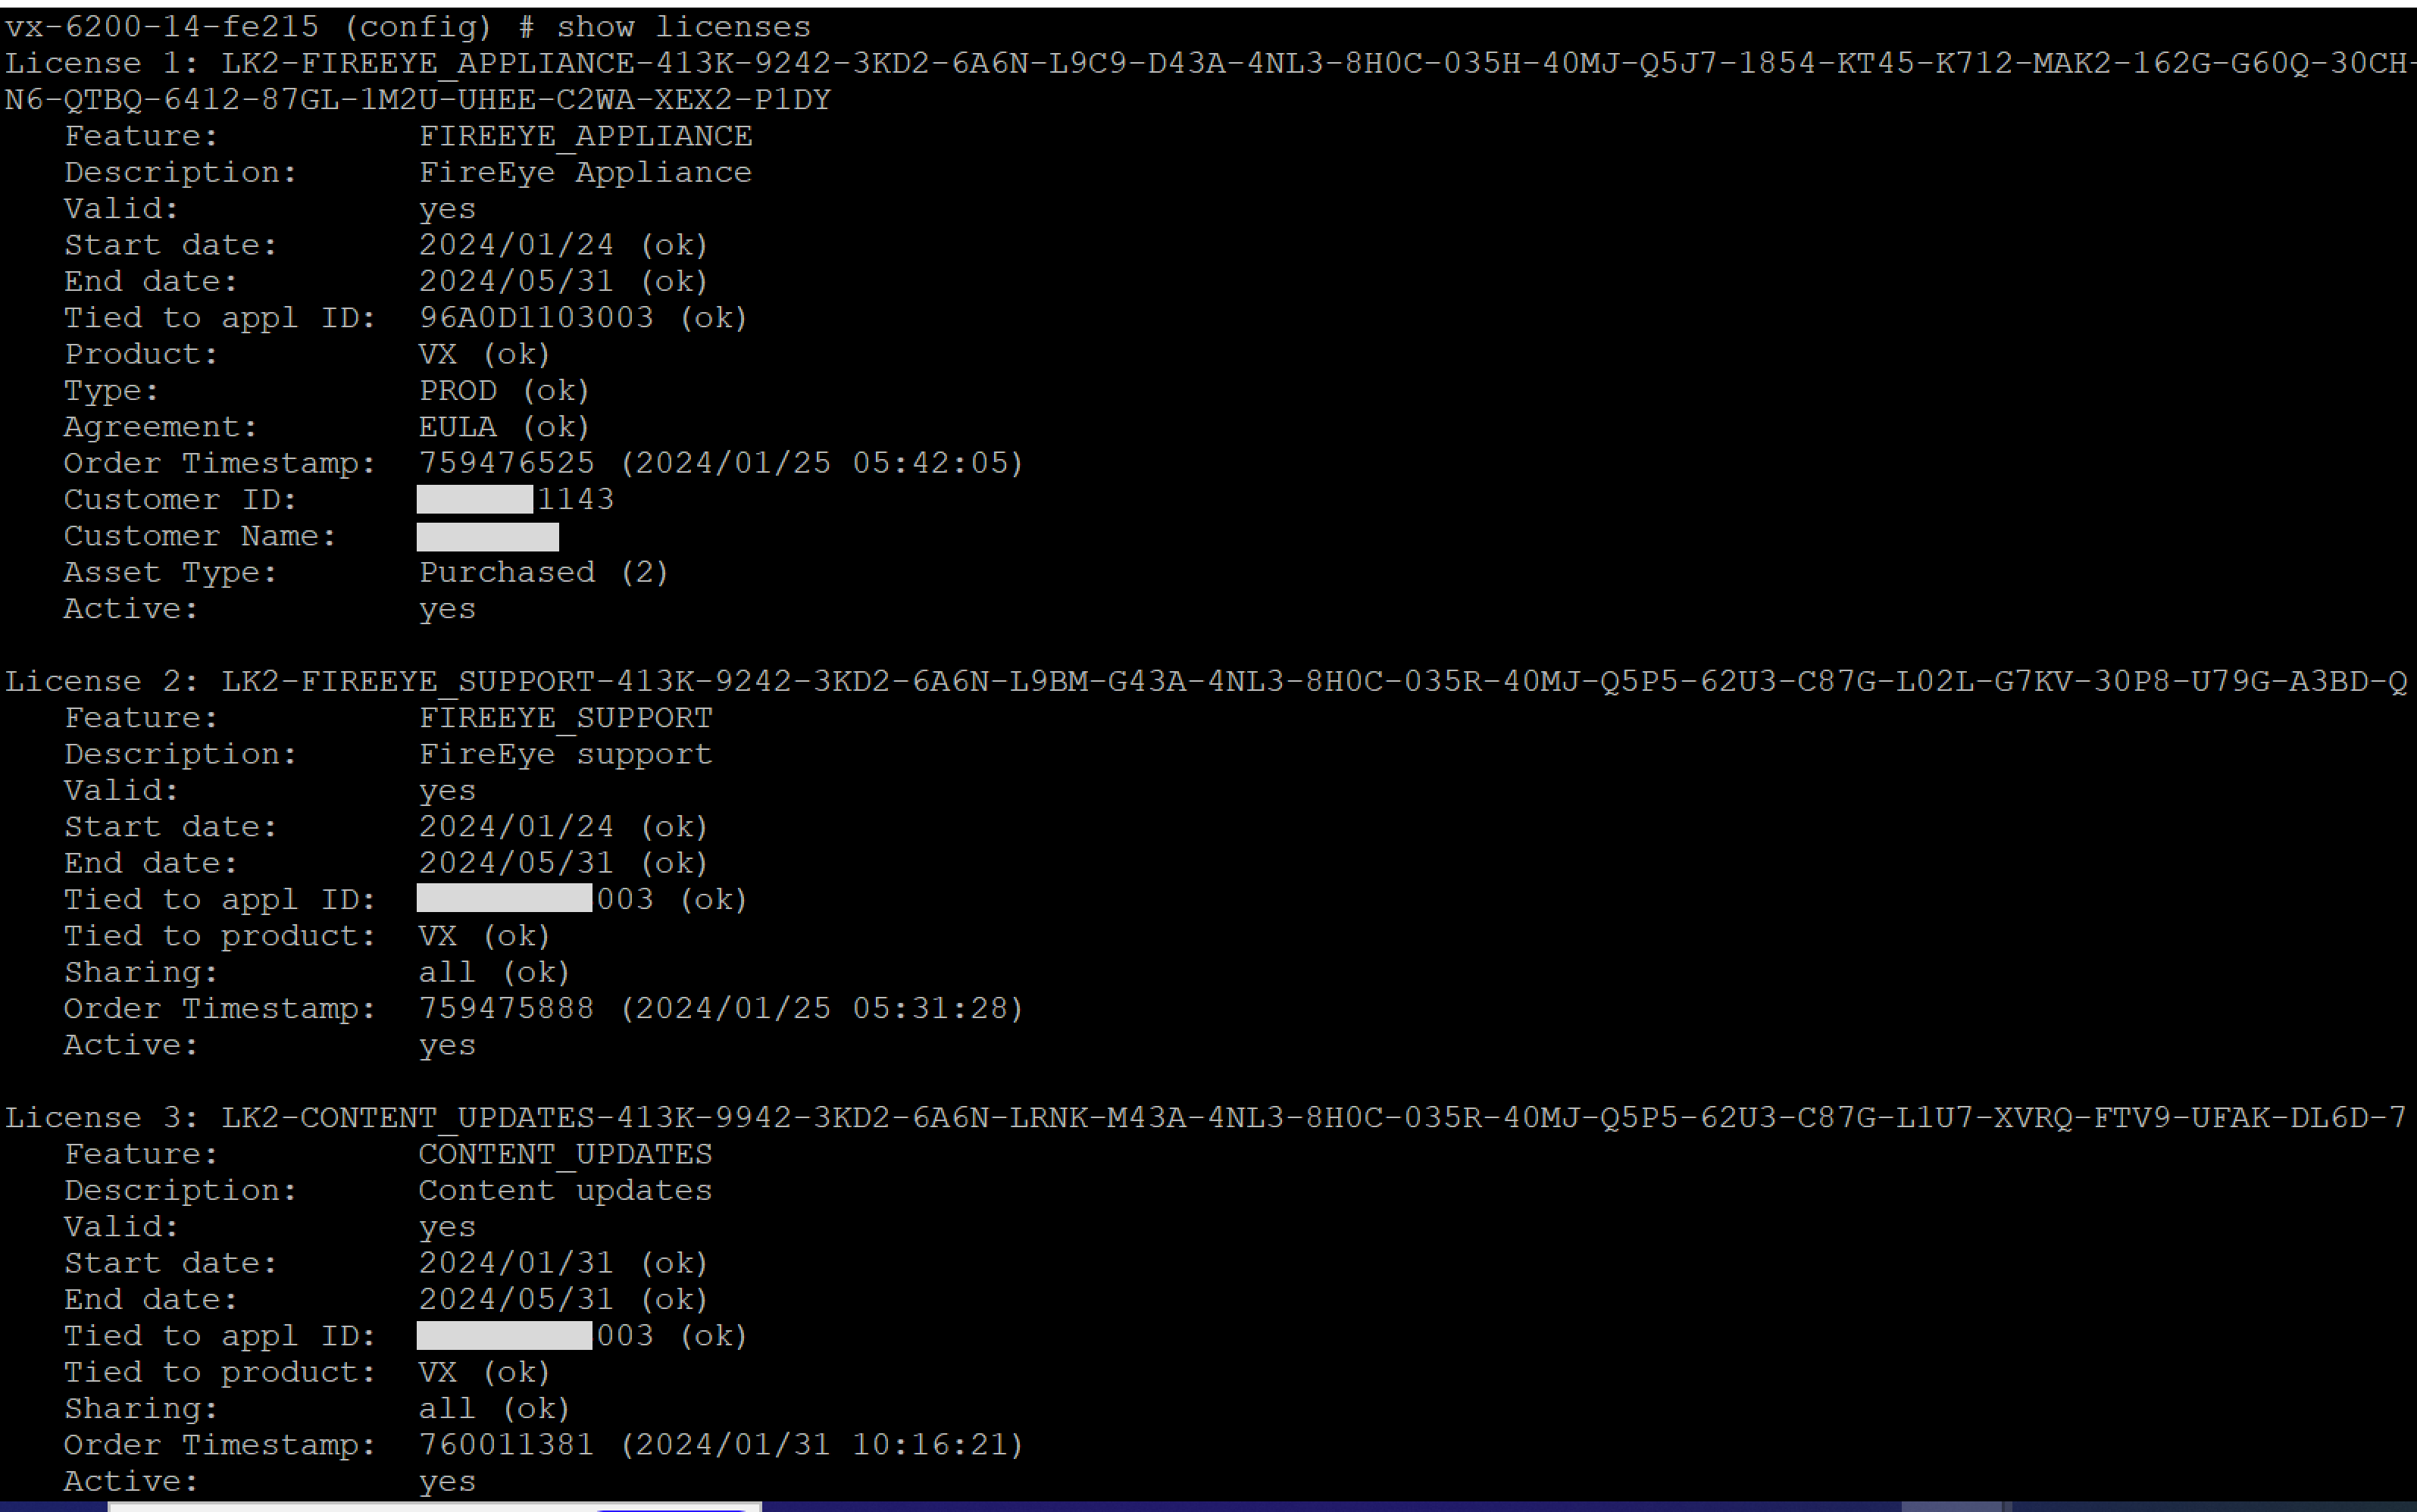
Execute the following command if you are unable to retrieve any of the three licenses. If you still encounter issues, contact Trellix Support.
hostname > enable hostname # configure terminal hostname (config) # configuration jump-start
Note
If you are operating on an air-gap network, you must contact Trellix Support or Professional Services to retrieve the license keys for your appliances.