Use this file to discover all available pages before exploring further.
The new docs.trellix.com features a modernized UI and AI-powered conversational search. Content is currently available in English, with additional languages launching in early November 2026. We hope you enjoy the updated experience.
If you want to update the Gateway Anti-Malware Engine for an offline Sensor, you will need to manually download the appropriate software version and import it into the Manager.
When the Gateway Anti-Malware engine is enabled for the first time, the engine is in uninitialized state when integrated with a Private GTI cloud. To receive a manual update, the Gateway Anti-Malware engine has to be in initialized state. To initialize the engine, the Sensor has to be online and connected to the Private GTI server to receive the update for the first time. Once the Gateway Anti-Malware engine is initialized after receiving the update from Private GTI server, you can push the updates to the Sensor. For subsequent manual Gateway Anti-Malware engine update, you can download the update and import it to the Manager.
Note
It is important that you download a compatible version of Gateway Anti-Malware Engine files to make sure the update is successful. To ascertain which software versions are compatible with which versions of the Sensor software, refer to Gateway Anti-Malware Engine in the section
How an Advanced Malware policy works in
Trellix Intrusion Prevention System Product Guide.
Perform the steps listed below to manually download the Gateway Anti-Malware Engine update files and deploy them to your Sensor.
On the page that appears, review the terms and conditions and select the
I accept the terms and conditions check-box, and click
Next Step.
Accept License Agreement You are routed to the next page where you will need to select the appropriate
Trellix product.
On this page, click the drop-down to select
Trellix Intrusion Prevention System, and click
Next Step.
Select update package You are routed to the next page where you must enter the appropriate version of Sensor software you are using.
Under step 3:
For
"Trellix Intrusion Prevention System" version, enter
10.1 if your Sensor runs on 10.1.5.x version, or enter
9.2 if your Sensor runs on 9.2.5.x version.
For
"Trellix Intrusion Prevention System" build number, enter
10.1.5.x if your Sensor runs on 10.1.5.x version, or enter
9.2.5.x if your Sensor runs on 9.2.5.x version.
Click
Next Step.
Specify version and build number The success or failure of the update will vary depending on the Sensor and Manager software versions you are using. Review this table to know the various combinations and what version you must enter to make sure you download the appropriate Gateway Anti-Malware Engine version.
Gateway Anti-Malware engine compatibility matrix
Manager
Sensor
Gateway Anti-Malware engine version downloaded
What you must enter...
10.1.7.55 or later
10.1.5.153 or later
2021
You must enter the Sensor software version as 10.1.5.x.
10.1.7.29 or later
10.1.5.41 or later
2019 version 0
You must enter the Sensor software version as 10.1.5.x.
10.1.7.4 or later
10.1.5.3 or later
2017 version 2
You must enter the Sensor software version as 10.1.5.x.
9.2.7.22 or later
9.2.5.27 or later
2017 version 2
You must enter the Sensor software version as 9.2.5.x.
9.2.7.22 or later
9.2.5.6 till 9.2.5.27 but does not include 9.2.5.27
2017 version 1
You must enter the Sensor software version as 9.2.5.x.
9.2.7.9 (or any 9.2 Manager hotfix before 9.2.7.22)
9.2.5.6 or later
NA
Manual import is not supported.
9.2.7.22 or later
9.1.5.40 or later
2017 version 1
You must enter the Sensor software version as 9.1.5.x.
9.2.7.22 or later
9.1.5.9 till 9.1.5.40
2014
You must enter the Sensor software version as 9.1.5.x.
Pre-9.2.7.9
9.2.5.6 or later
NA
Manual import is not supported.
Click
Generate Update Package.
Generate Update Package
Click
Download and save the package to a convenient location.
Download Update Package After the package is generated, you are shown details about the file such as filename, file size, MD5, SHA1, SHA256 checksums and date.
After the file is downloaded, log on to the Manager and go to
Manager → <Admin Domain Name> → Trellix IPS Protection Status. Select
Manual Import tab. The
Manual Import tab is displayed.
In the
Manual Import tab, click
Browse, navigate to the file location, and select it.
Select the file and click
Import.
A pop-up opens giving you the status of the upload.
After the upload is complete, go to
Devices → <Admin Domain Name> → Devices → <Device Name> → Deploy Pending Changes.
In the
Deploy Pending Changes page, the
Pending Changes column displays
New Gateway Anti-Malware Versions.
Select the check-box for
GAM Updates and click
Deploy.
Results
A pop-up window appears showing you the status of the update. Upon successful deployment, click
Close in the pop-up window.
Note
If the update fails, it is likely that you have downloaded an incompatible version. Review the compatible versions and the combinations listed in the
Gateway Anti-Malware engine compatibility matrix table to ascertain if you have downloaded the appropriate version.
There is an alternate way to deploy the GAM update file to your Sensor from the
Device Manager page. To deploy:
Navigate to
Devices → <Admin Domain Name> → Global → Device Manager and select
Sensors tab. The
Sensors tab is displayed listing all the attached Sensors.
Select the compatible Sensor on which you want to deploy the GAM update file, and click
Sync.
Select Sensor to synchronize GAM Updates
The
Sync: <Device Name> window is displayed with
GAM Updates check-box selected. If there are any other pending deployments, the respective check-boxes will also be selected by default. You may uncheck any of them if you want to skip their deployment.
Note
The Manager provides an option to concurrently deploy pending changes onto multiple Sensors. When you select multiple Sensors for deployment, a
Bulk Sync window is displayed with all check-boxes selected by default. You may uncheck any of them if you want to skip their deployment.
Click
Sync to begin the deployment.
GAM Updates selected for synchronization
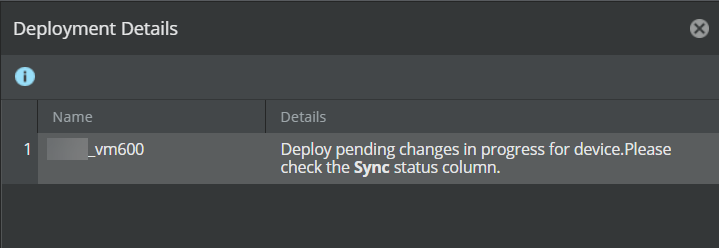
A
Deployment Details dialog-box is displayed, click
.
Deployment Details
You may click the
icon to refresh the
Sensors tab and view the latest Sync status.
Upon successful deployment, the status is displayed as
Synchronized, and the deployed version of GAM is displayed under the
Protections column.
Note
You can also view the deployment status in
Manager
→ <Admin Domain Name> → Troubleshooting → Logs under the
Background Tasks tab. The status is displayed as
In Progress during the deployment and
Complete upon successful deployment. You need to refresh the tab to view the latest deployment status.
Note
If the Sync fails, it is likely that you have downloaded an incompatible GAM version. Review the compatible versions and the combinations listed in the
Gateway Anti-Malware engine compatibility matrix table to ascertain if you have downloaded the appropriate version.
.jpg)
.jpg)
.jpg)
.jpg)
.jpg)
.png)
.png)
 .
.
 icon to refresh the
Sensors tab and view the latest Sync status.
icon to refresh the
Sensors tab and view the latest Sync status.